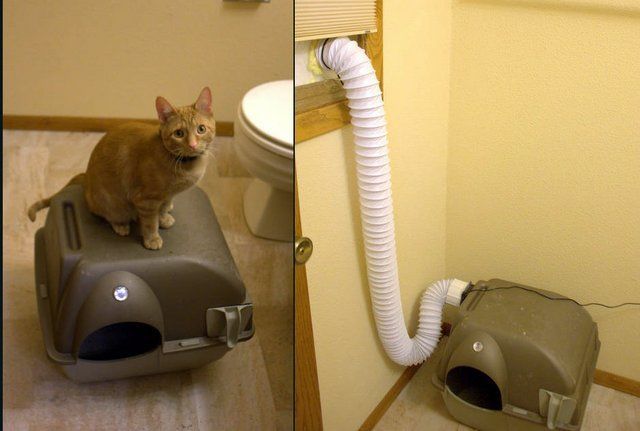
A Cheap DIY Ventilated Cat Box
The following post explains the process of building a DIY/Cheap ventilated cat box. The total processes is fairly quick once you have the parts. The application for this type of litter box modification is if you live in an apartment or happen to work a job where it is not always possible for you to get home and take care of your animal’s business.
Tools
- Dremel tool with assorted cutting blades and drills (This will be the easiest to use – use a 4000 series)
- Hot Glue Gun or Shoe Goo some times called
- Drill (Optional but useful)
- Razorblades are also helpful to cut the foam and other soft stuff
Vented Litter Box Components Required
- Covered or semi covered litter box. ( I used a Omega Paw Self-Cleaning Litter Box ->(Currently Cheaper on Ebay) – Do not pay more than about $35 for it they go on sale. Most of the time that litter box is under 30 shipped)
- Note: You could just use a storage tote for a cat box it doesn’t need to be fancy.
- A USB powered fan -> I used the Infinity AI-MPF80A Quiet 80mm USB Fan $10 Shipped off amazon. They are also available on Ebay, but are more expensive.
- The fan is the only tricky part to find on this build I do recommend the fan mentioned above. It is low voltage (5v) so it should not be a fire hazard and it should not be able to hurt your cat even if he/she eats through the fan wire.
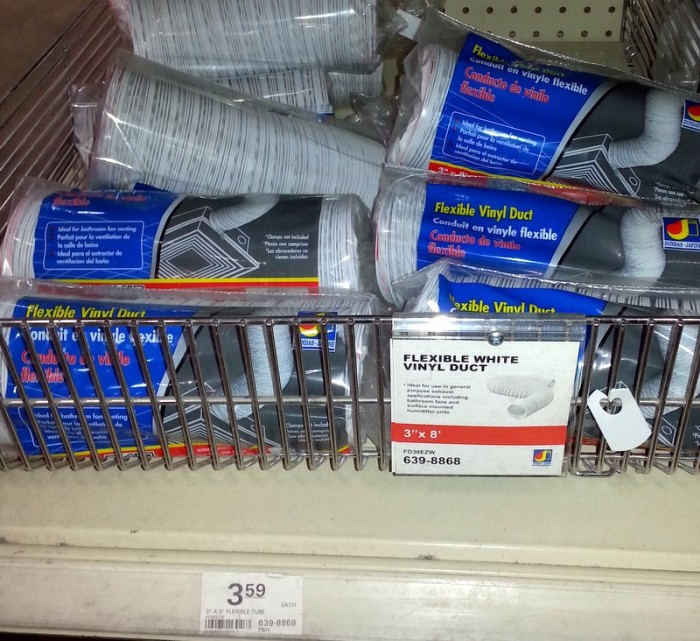
- 3″ Flexible White Vinyl Duct. (Your best bet is a local store. You can buy it online, but it will cost 3 times what it should) Menards and Lows will both have it for under $4 [Expected Price $3.59]
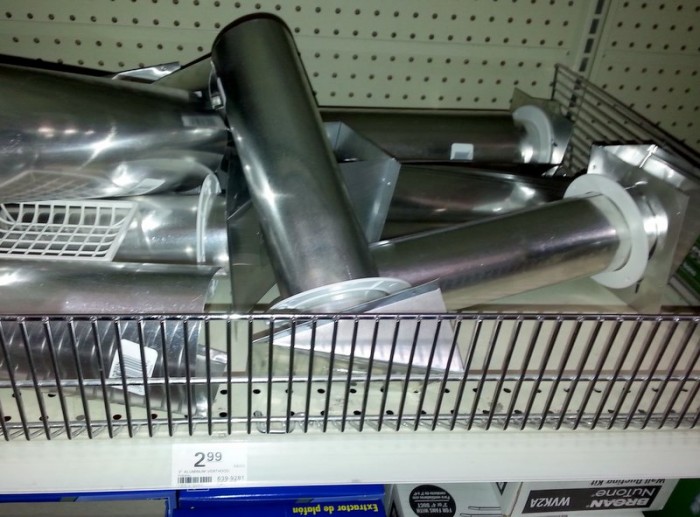
- 3″ Aluminum Vent Hood (Should be near the flexible duct) [Expected Price $2.99]
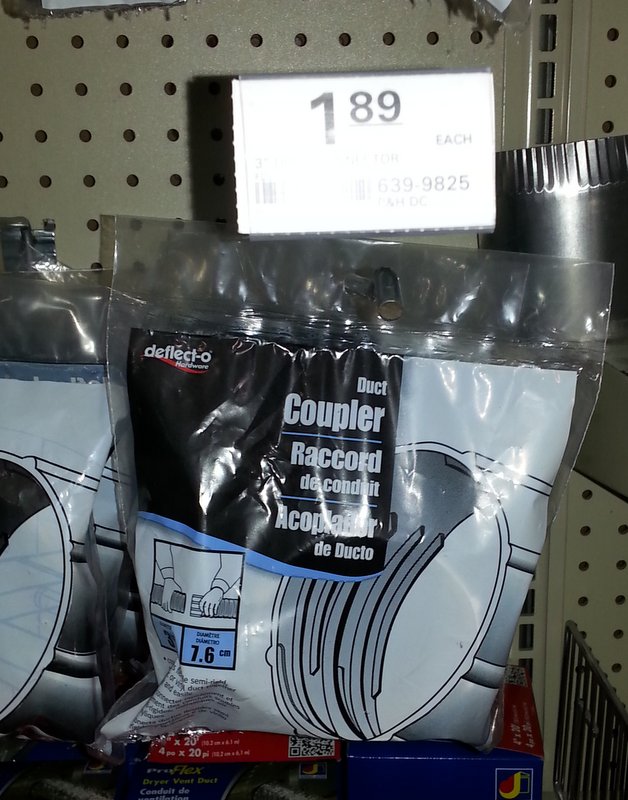
- 3″ Duct Coupler (Should be near the flexible duct) [Expected Price $1.89]
- Chunk of foam to put in the window. Can be trash or store bought.
Optional Components
- Indoor Window Insulator Kit – The stuff to put over old inefficient windows in the winter.
- USB extension cable <-Amazon is you best bet. The wire that comes on the fan is ~6 ft.
Time Required: 30 Minutes – 1 Hour
Instructional Video How to Build a Ventilated Cat Box
Written Instructions How to build a vented cat box
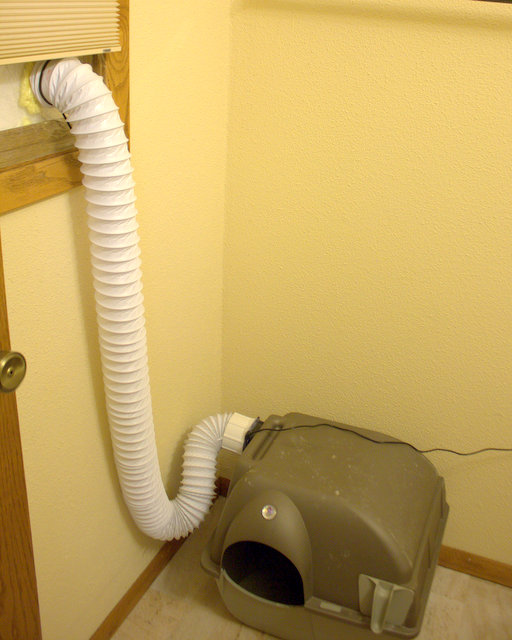
1 Making your window vent. (You will likely have to come up with your own solution for this)
- Cut a piece of foam to fit snugly in your window. Start big you can always whittle it down if needed. Or measure 🙂
- Push your dryer Vent through the foam. The edge should be sharp enough to cut through the foam.
- Cut the tub on the dryer vent down to a more useful length.
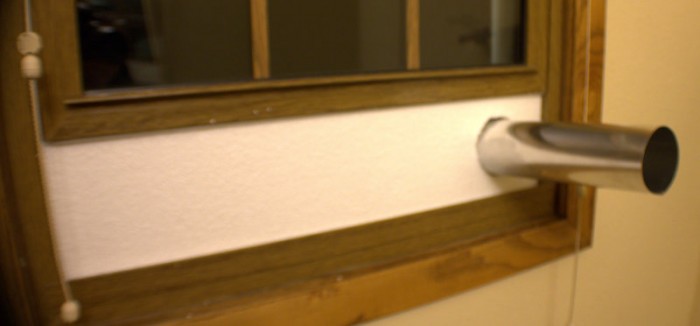
Step 1 Dryer vent testing
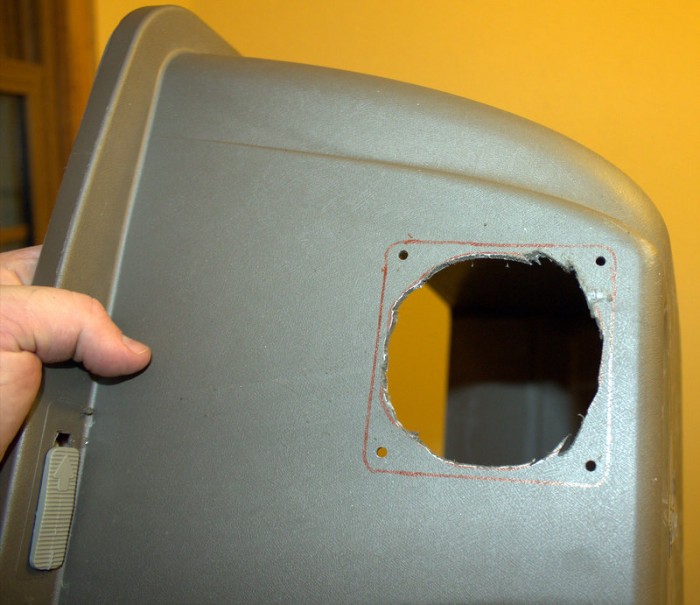
2 Modification of your existing litter Box
- Take the guards off of your pc fan.
- Place the PC fan in the location you plan to put the vent look for any possible access obstruction
- Trace the an outline of the PC fan on the litter box
- Drill small pilot holes where the screws will pass through
- If you have a real drill switch bits and enlarge the holes to the proper size for the PC screws. If you do not have a real drill you can ream out the holes with the dremel
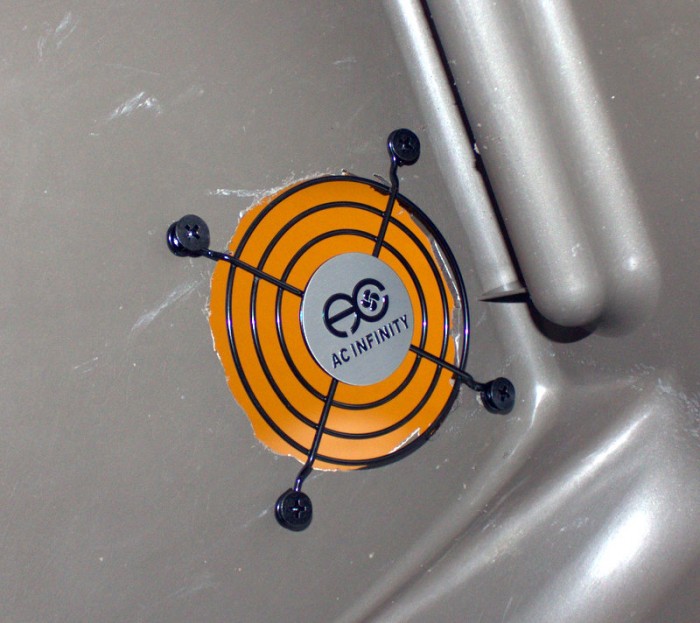
- Put the protective guard on the inside of the cat box. If the holes you drilled in your cat box were close to the size of the screws you will be able to screw the guard onto the cat box. Screw all four screw in to the fan guard. Let the screw be flush with the plastic on the outside. (Makes life easy when you go to screw the fan on)
- Hot glue your Duct Coupler to your PC fan. (Note arrows of spin and air flow in photo below)
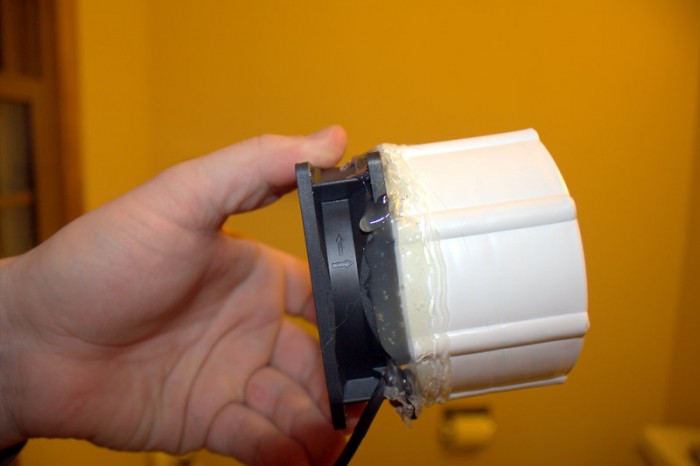
The duct coupler will allow you to quickly detach your litter box from the wall.
- Once cool place your fan over the screw holes, and finish tightening them down in tern holding the fan firmly in place. It can be a little difficult to get the screws to start. It is helpful to have a drill for this step, but it could be done with a screw driver and a little elbow grease.
- For added strength and smell suppression hot glue the fan to the cat box.
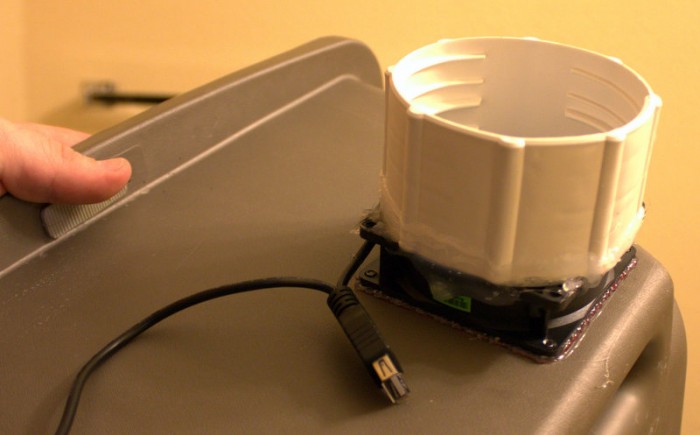
- Reassemble the little box and connect your dyer duct.
The top part is just held on with a zip tie. You could use a hose clamp if you really wanted, but it fits quite tight so a hose clamp probably is not necessary.
If you have any questions or would like clarity please leave comments.
Examples of what the components look like in the store.


Thanks so much for showing your solution. It looks quite do – able. I gave my cats a double decker litter by way of 2 black plastic mixing tubs set on a salvaged entertainment stand. I’m planning 5 enclose all that in a kind of teepee and then vent the teepee.
Is the air blowing in the litter box or pulling it out, like a dryer?
Pulling out.
You want negative pressure in the box.