The following explains how to build sluice box from everyday materials. Functionality of this unit is based on a boil box or gravity column. The advantage of this design is that you are only left with metals in your boil boxes. All of the blonds and nearly all of the black sand is blown out the back end and you are left with gold. As with any sluice you will lose some gold, but the amount of material that can be processed is impressive and the only reason you would have to pan is if you are running some kind of secondary sluice or matting between boil sections. Information can be found here on the basic design (also on the yahoo group mentioned on the forum). This modification of the design uses acrylic, PVC, adhesive, and threaded rod as building materials. In this example we use epoxy, but if I build another I will be sure that the edges of the acrylic are smooth enough to be chemically welded. Clearly, it would be better to build the sluice out of metal, but just about anyone should be able to come up with the tools required to build out of acrylic. This sluice should last a season or two if you aren’t too hard on it. This sluice design will work best on fine material such as fine gold and sand. The real target for this kind of sluice is beach sand, fine sand from streams, and glacial gold from classified material. Water flow and material classification are your only variables, but if you found this post I probably do not need to explain those things to you. I do suggest that you classify your material down to a fairly fine mesh size. Probably at least 14 or higher mesh ~1.2 mm. Common aluminum window screen would probably work fine.
For testing purposes with this size sluice you will need at least 1000gph. If you want to run bigger material through you may need 1600 or more. I have honestly never run on the upper limit because the material I run is small.
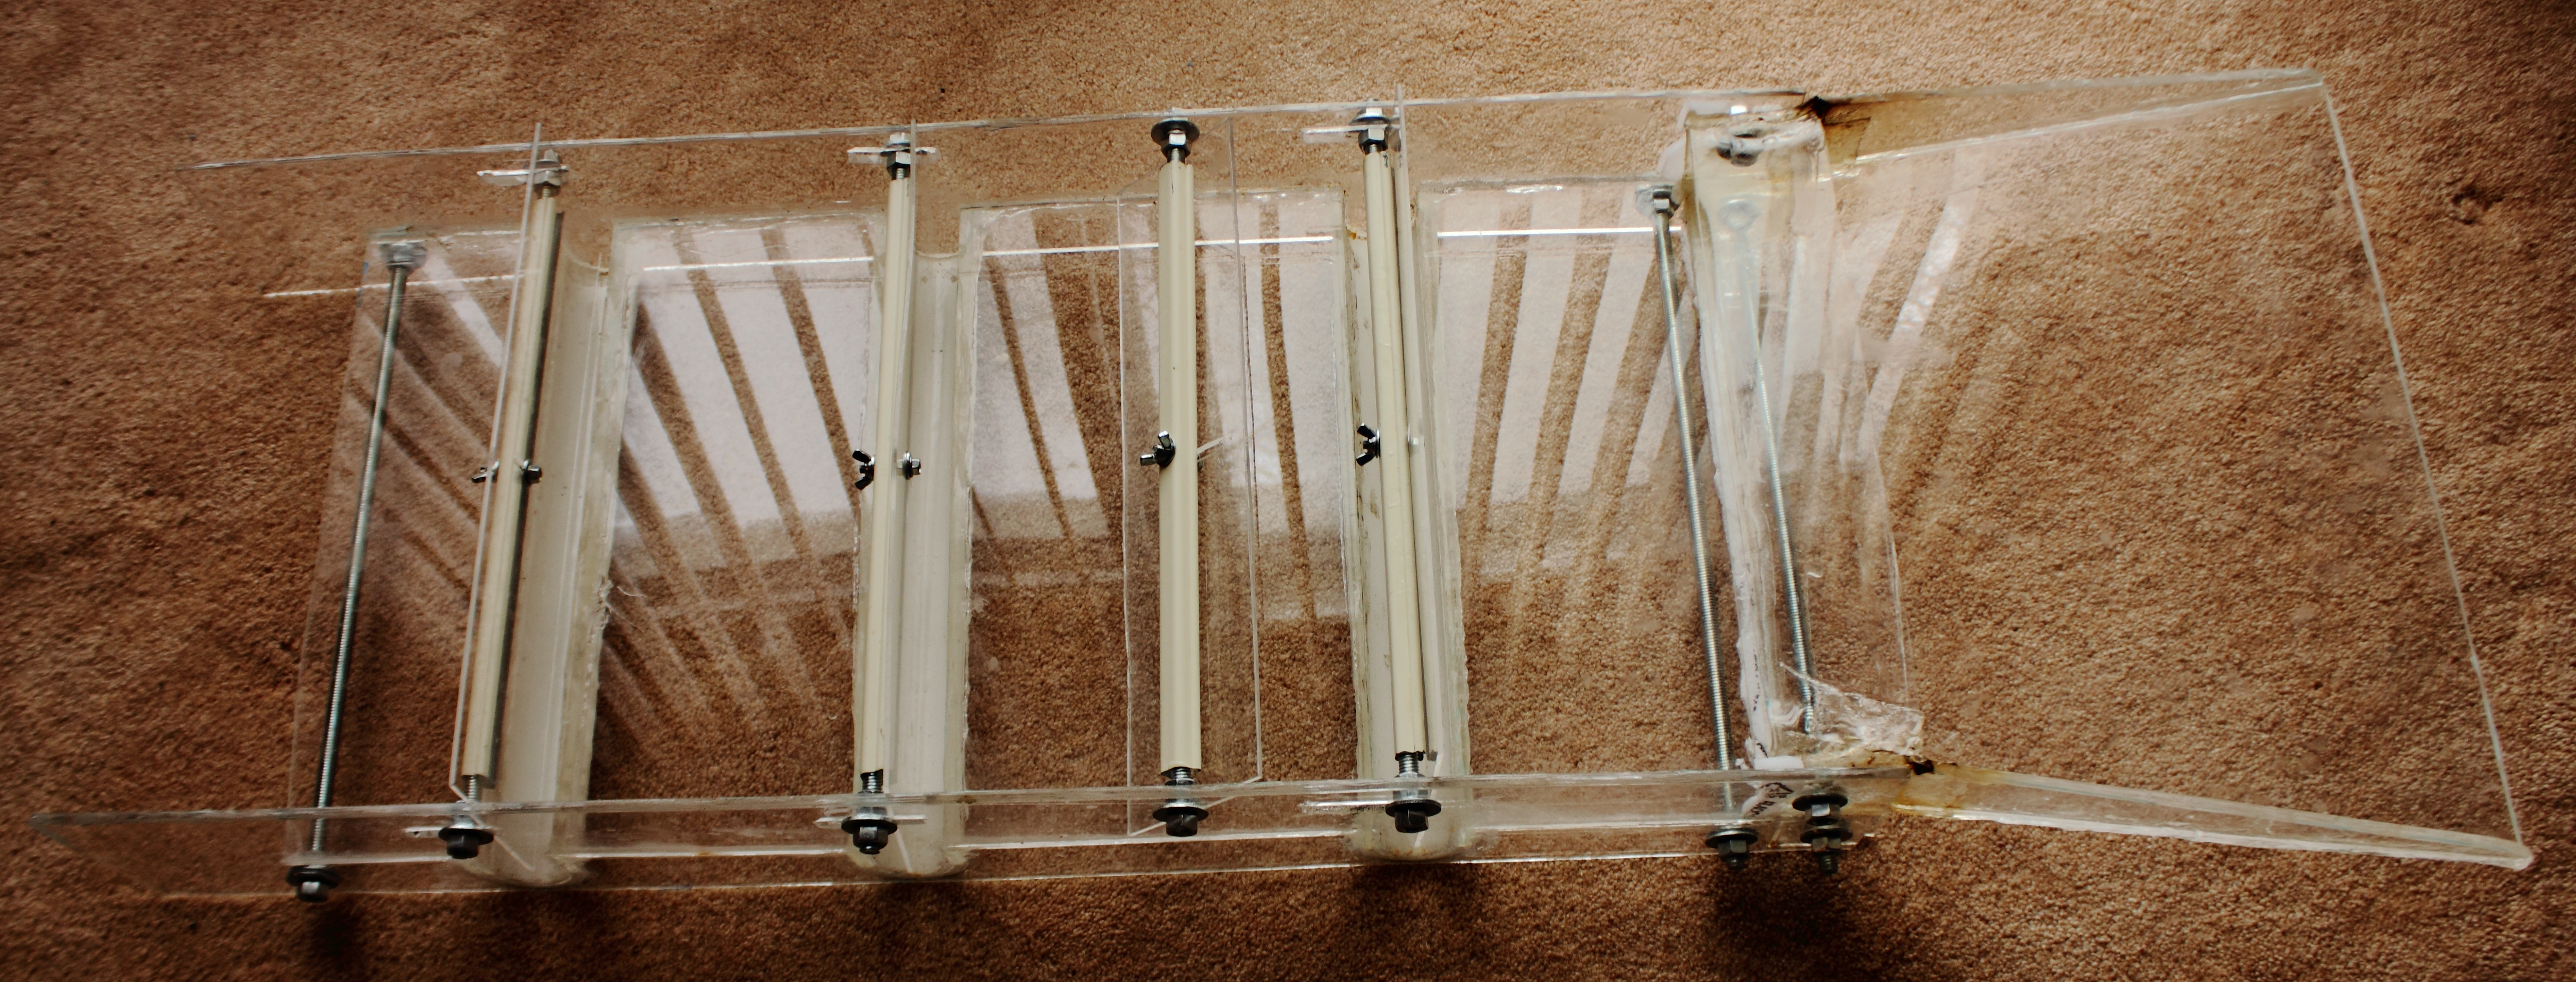
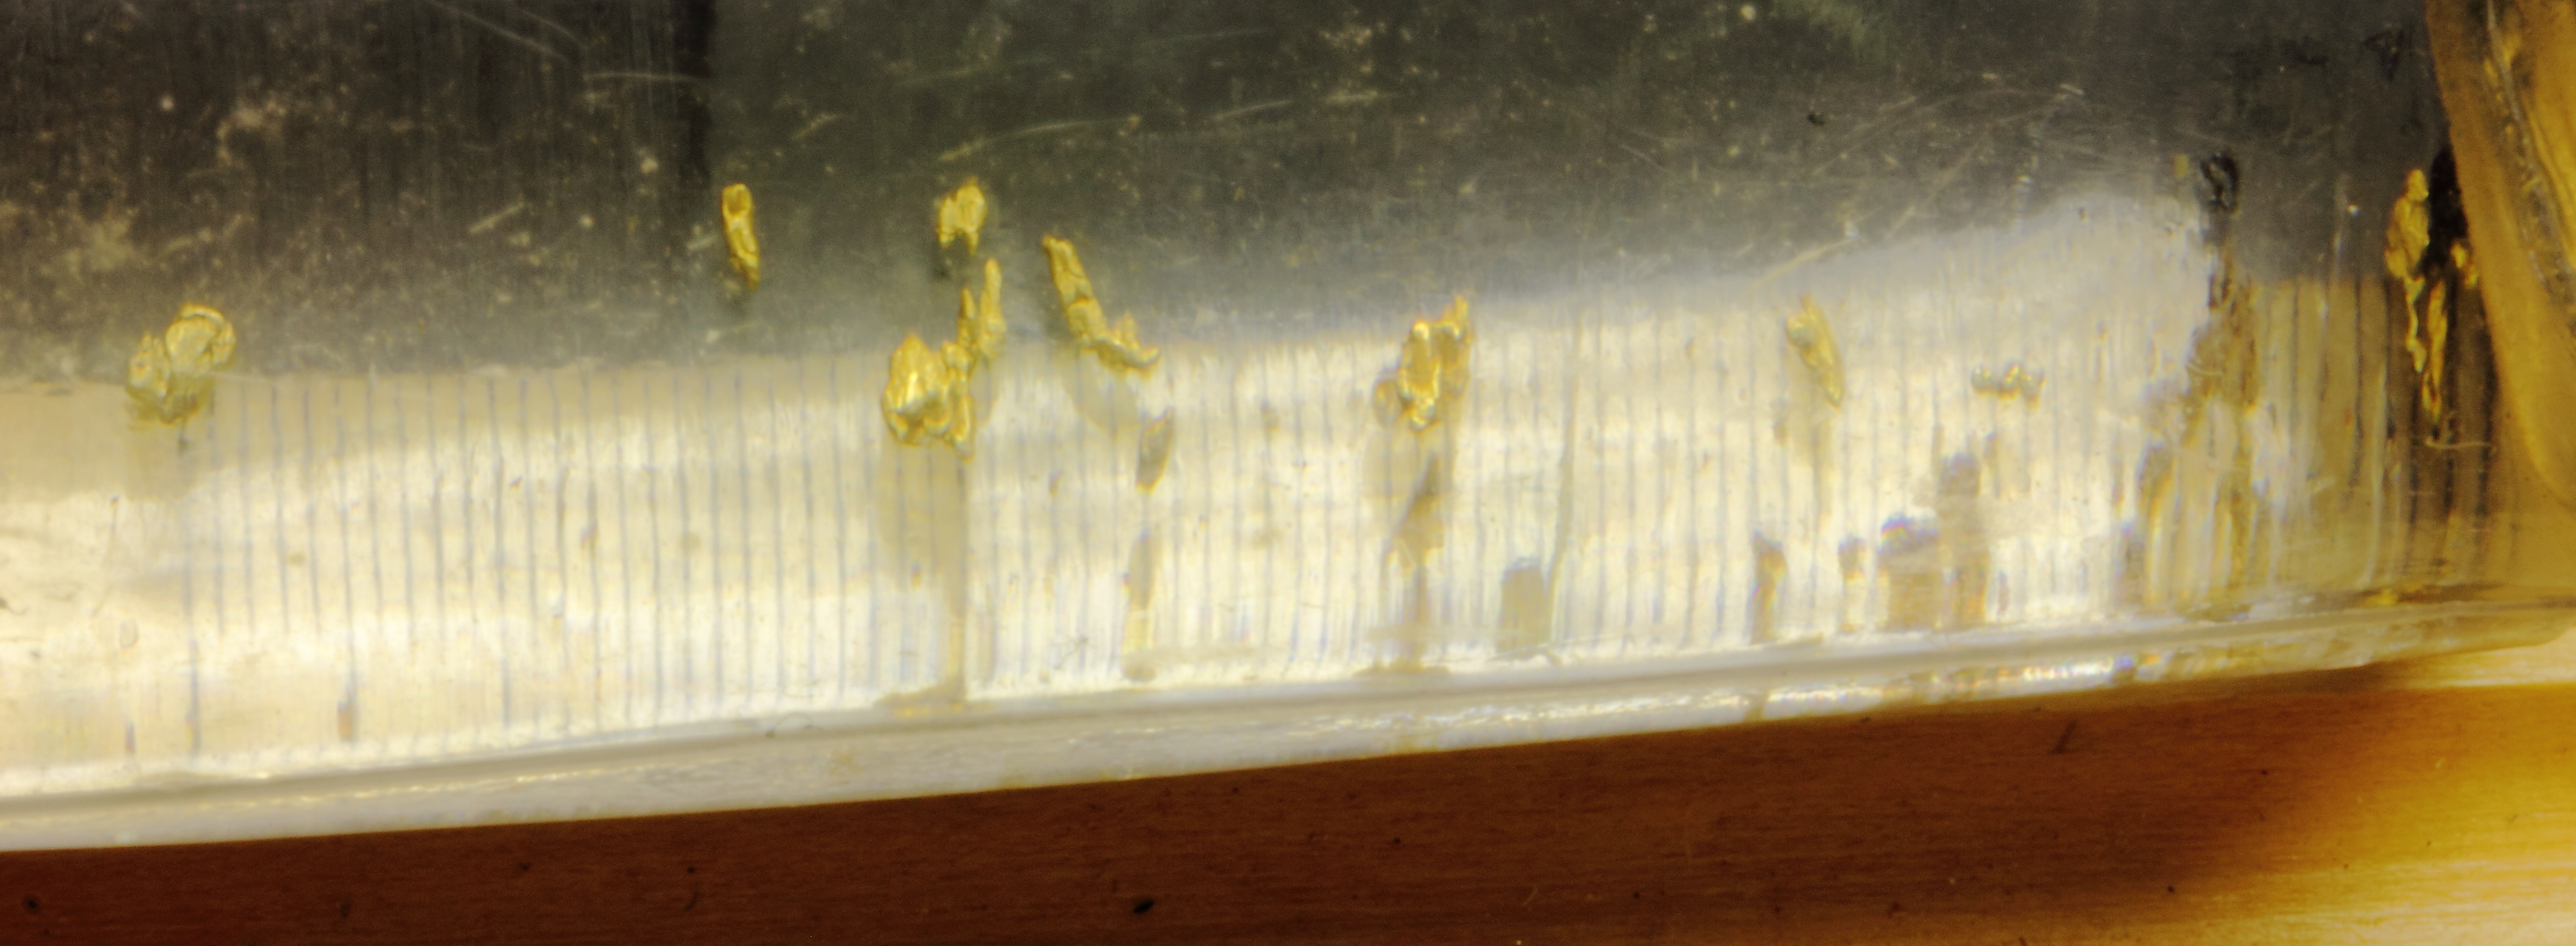
Finished product (Rough prototype):
Your sluice will probably look better because mine was assembled as I came up with the plan on the fly. Feel free to modify any of my plans. Post back any changes you make to help others improve on the basic design.

Side
Top
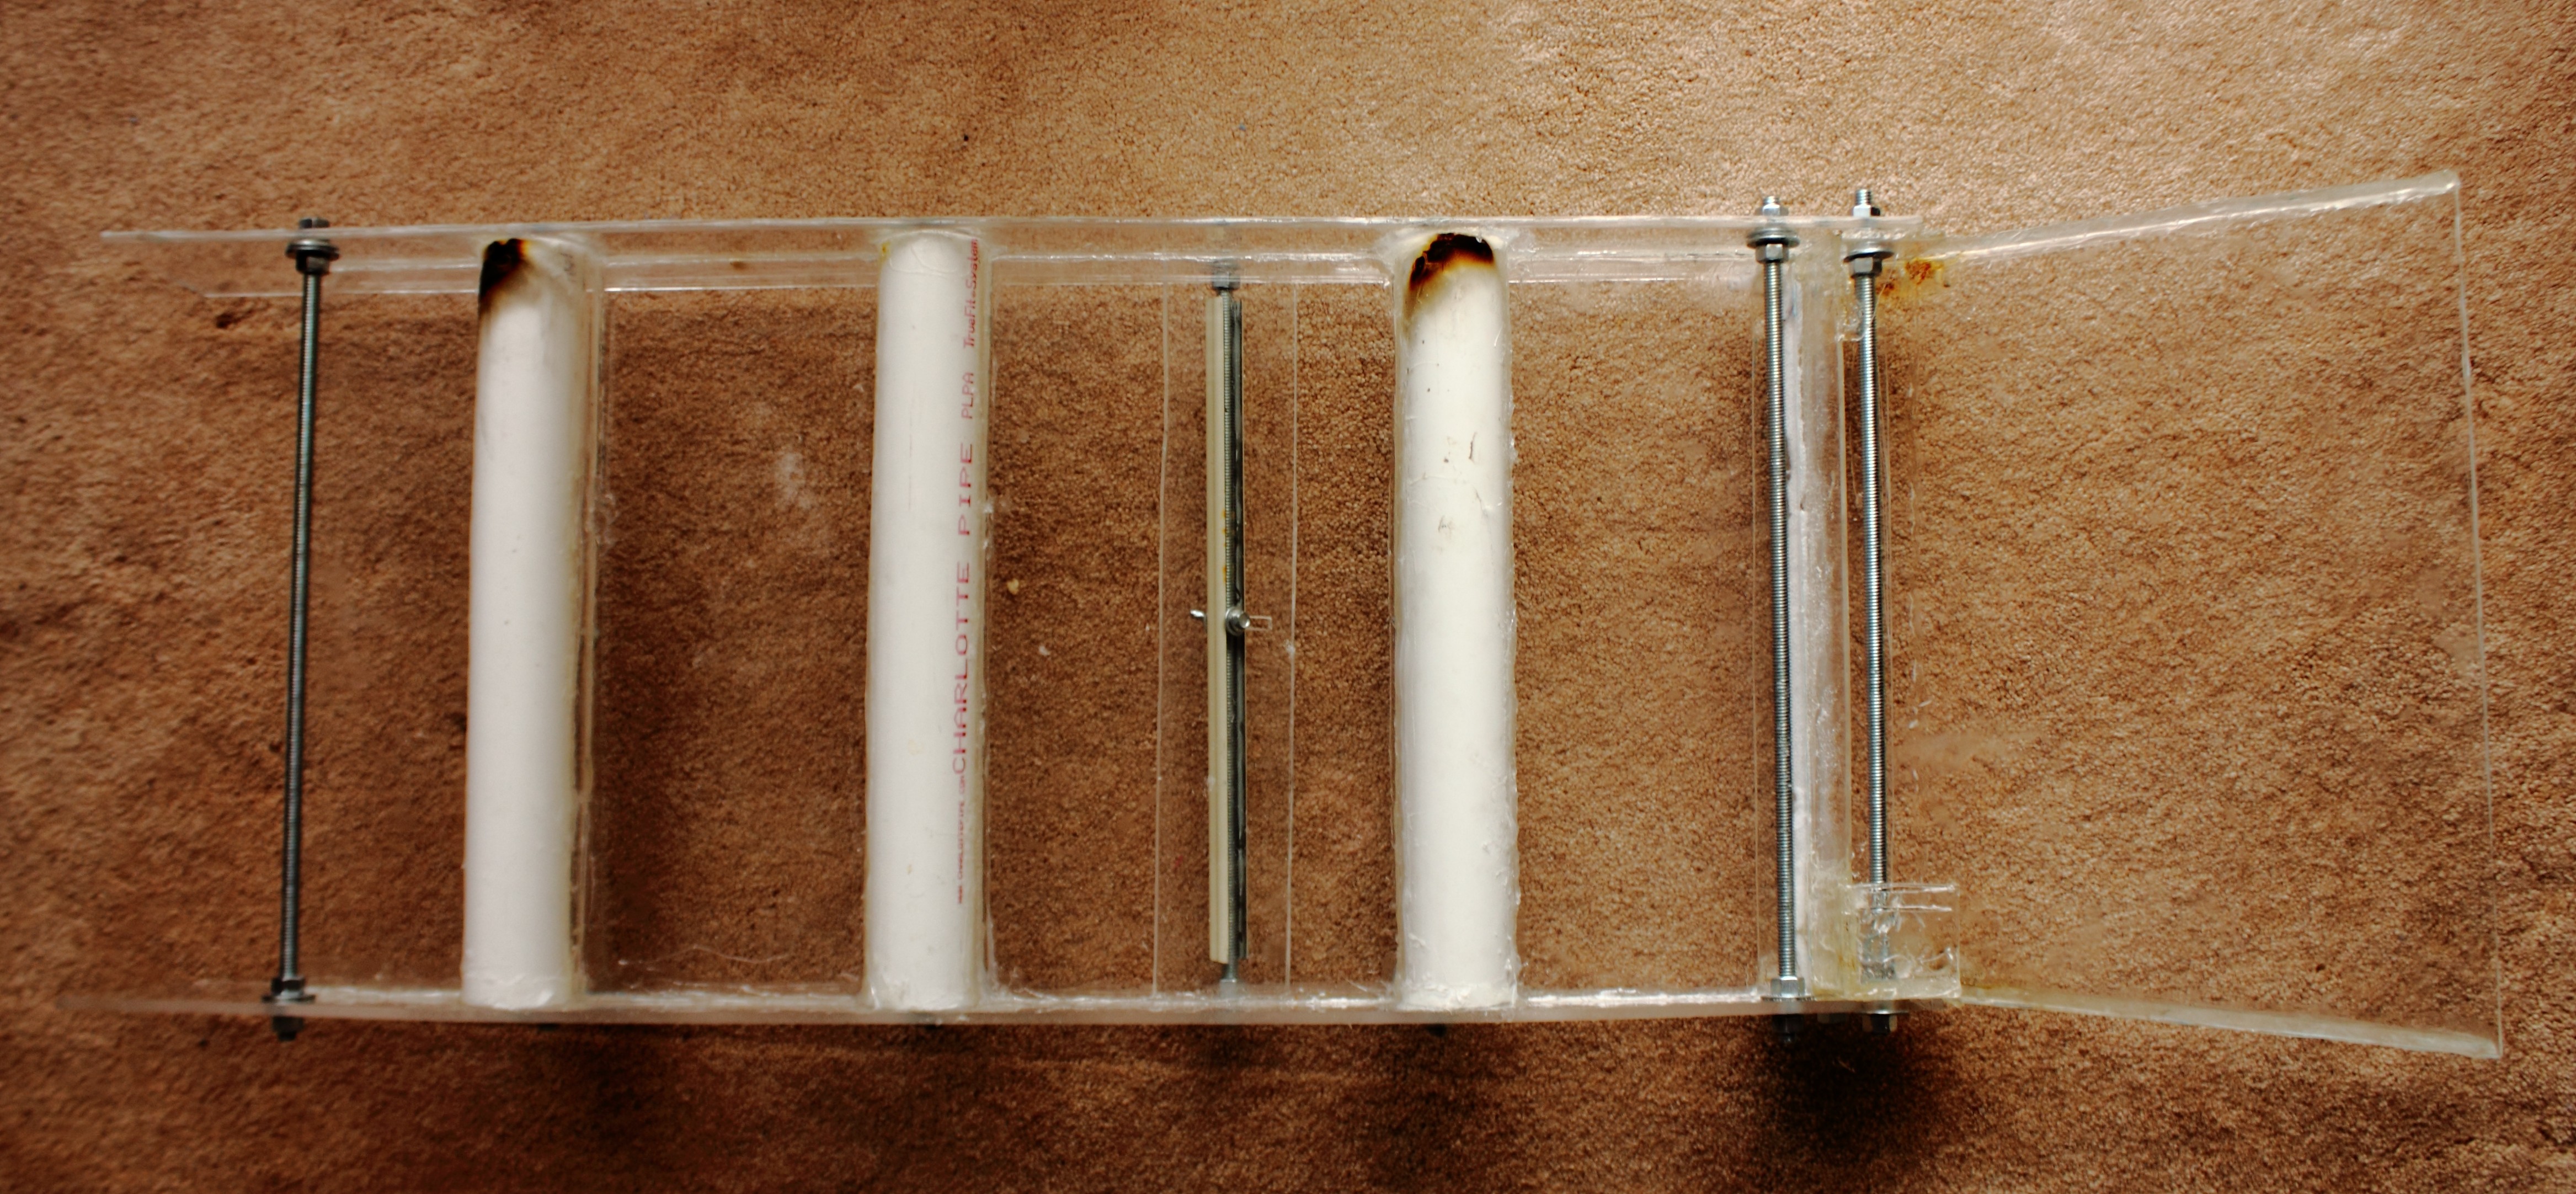
Bottom. (Never mind the burn marks)
Materials Required
| Quantity |
Product Description | Cost | Store | |
| 1 | clear acrylic .22 thick 24″ by 48″ | $39.99 | Menards | |
| 1 | clear acrylic .100 thick 18″ by 24″ | $9.99 | Menards | |
| 1 | 1-1/2″ PVC by 6′ (about) | $3.60 | Menards | |
| 1 | Loctite Epoxy – Professional Heavy Duty Epoxy 5 min | $15.67 | Menards | |
| 1 | Loctite Clear Silicone Sealant | $3.87 | Menards | |
| 2 | Threaded Rod 3/8-16 x 6Ft. | $8.56 | Menards | |
| 1 | GripFast 3/8″-16 Zinc Plated Hex Nuts 1Lb Pack | $2.28 | Menards | |
| 2 | GripFast 3/8″ Flat Washer Grade 8 – 35pcs/pack | $3.28 | Menards | |
| 1 | White 5′ Wire Channel (raceway) | $6.99 | Menards | |
| 30 | Small machine screws, washers and wing nuts | $5 | surplus | |
|
$99.23 |
Tools
- Assorted Clamps
- A means of cutting acrylic and PVC
- Straight edge
- Square
- Ruler
- Writing utensils
- Drill and drill bits (up to 3/8″)
- Steady hands and time. (This will take you a few hours/days because you have to wait for things to dry) You will want to have a space available that will not be disturbed by others.
If you have a router or a good table saw you should watch this video if you have never worked with acrylic. I could not get my cuts clean enough to use this method so I used epoxy to temporally hold my sluice together.
If you DO NOT have a router and/or good table saw like me you will want to watch this video
Click the thumb nails to make the images larger.
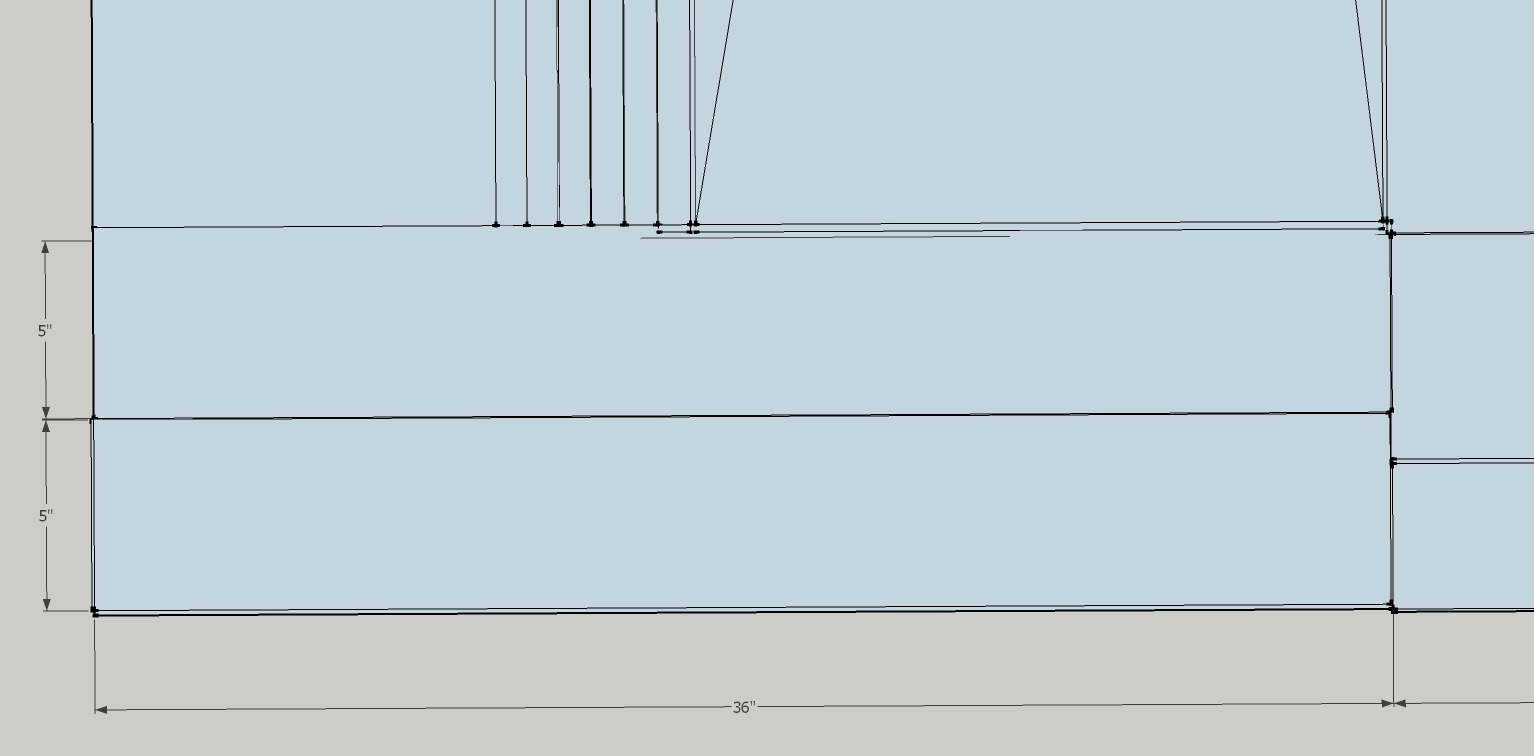
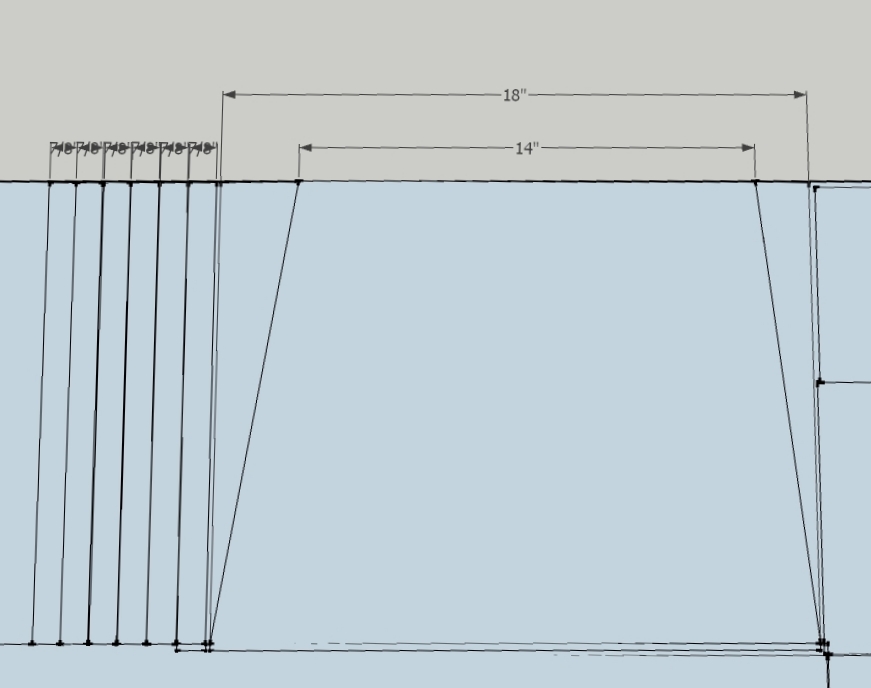
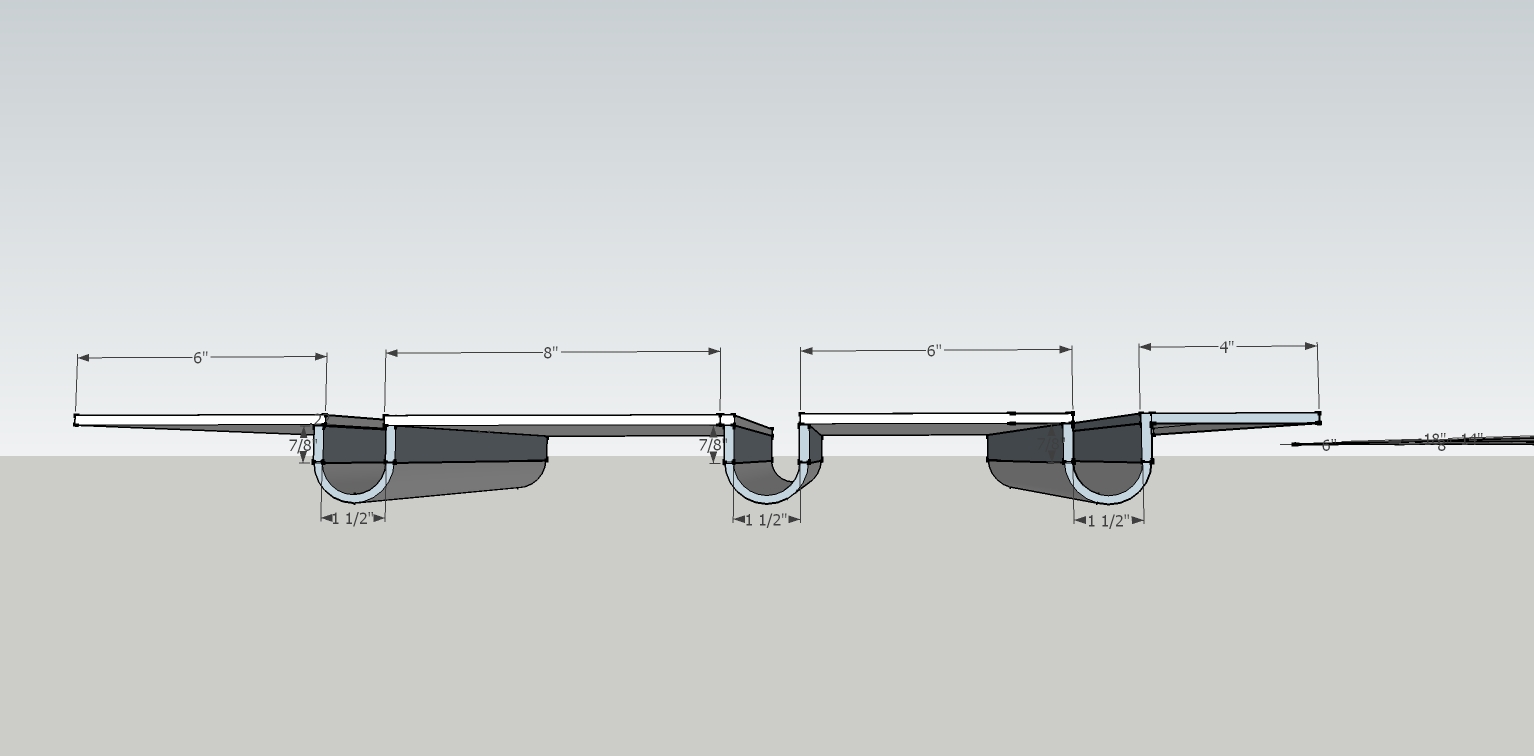
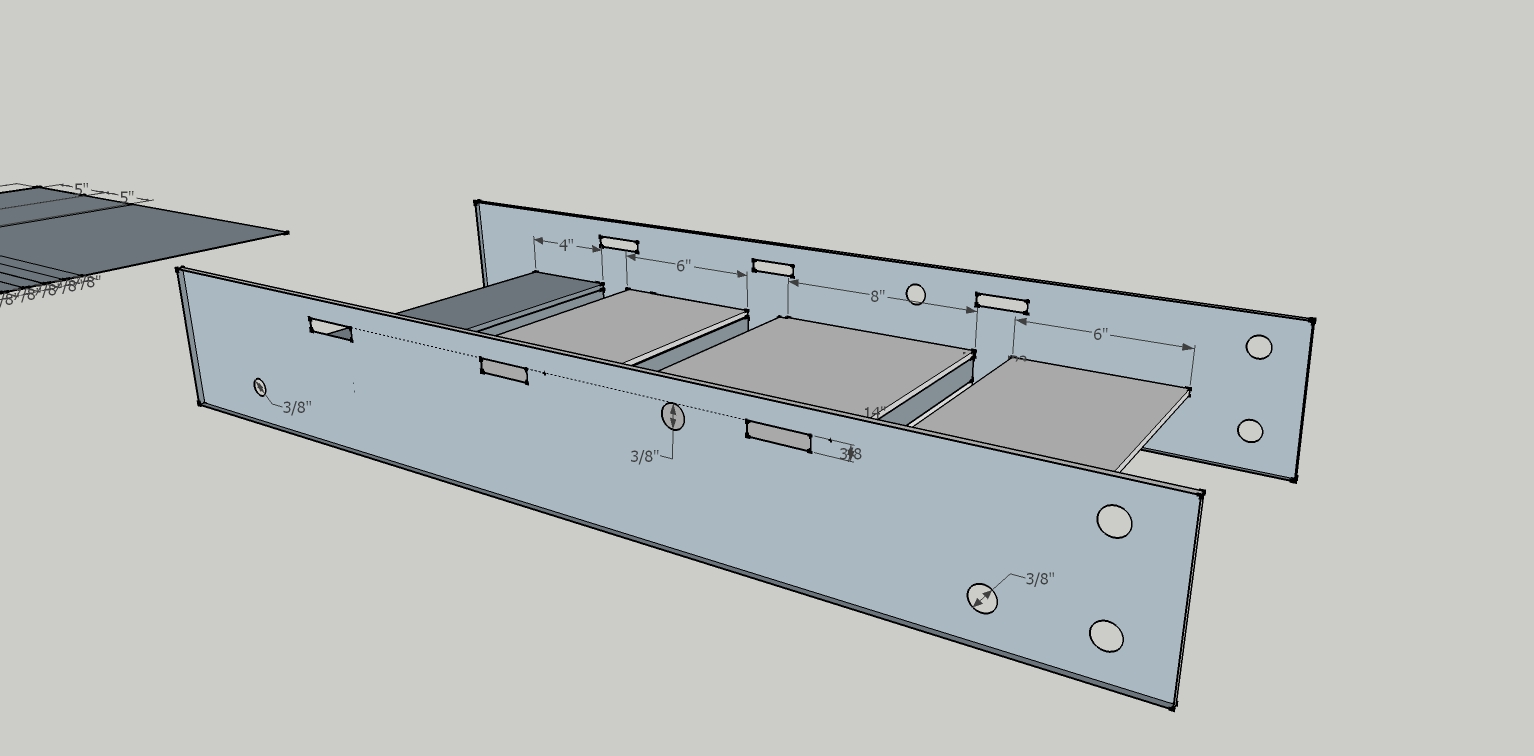
1. First we start with our largest piece of acrylic. This image shows most of the mandatory cuts that are needed. The top left section of the image that you might want to use for reinforcing.
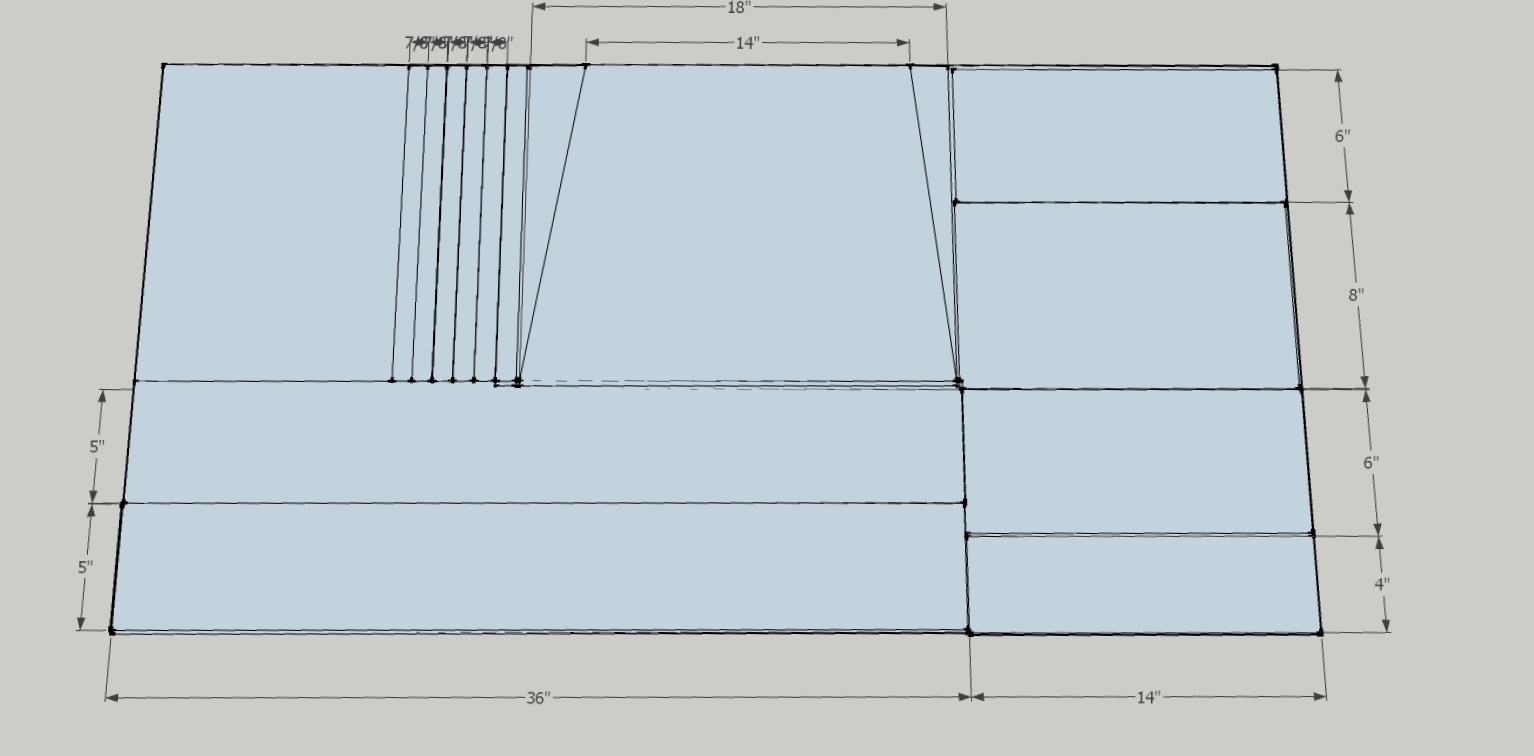
2. Cut these first. They makeup the bottom of the apparatus. A boil box riffle will go between each. I ended up cutting them free hand with a drummel which was a little ugly, but it worked. Do not worry if you screw up one or two of these because you should have some scrap material that will work when you are done.

3. Cut the sides of the sluice.
5. Cut the mouth section of the sluice. As with anything in this tutorial feel free to make any changes you want. I am not 100% sure this sizing will work as I won’t get to test it in a river until spring.
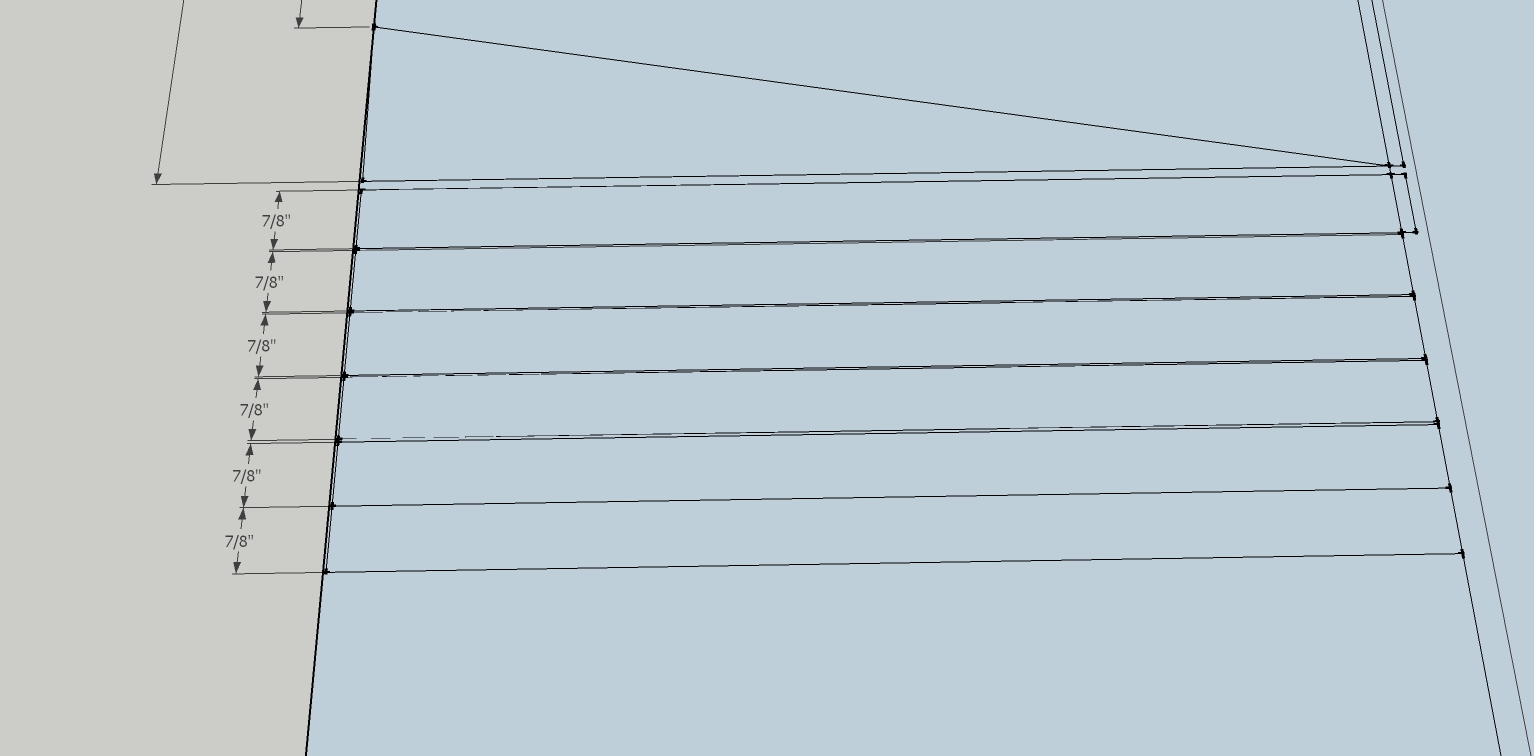
6. Cut the walls of the riffles. They should be 0.85″ long.
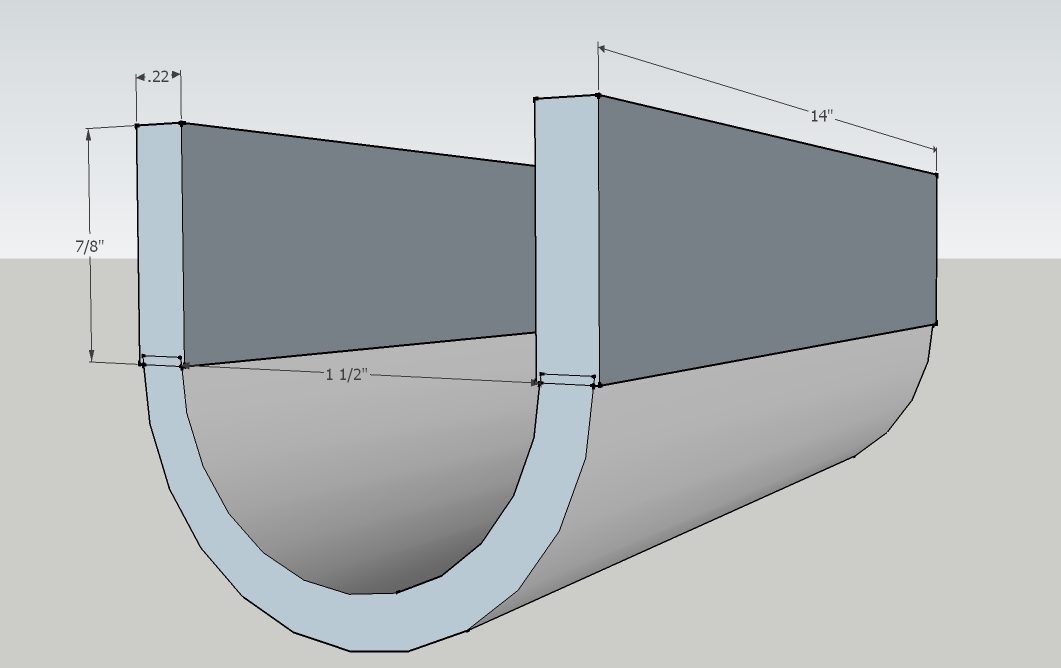
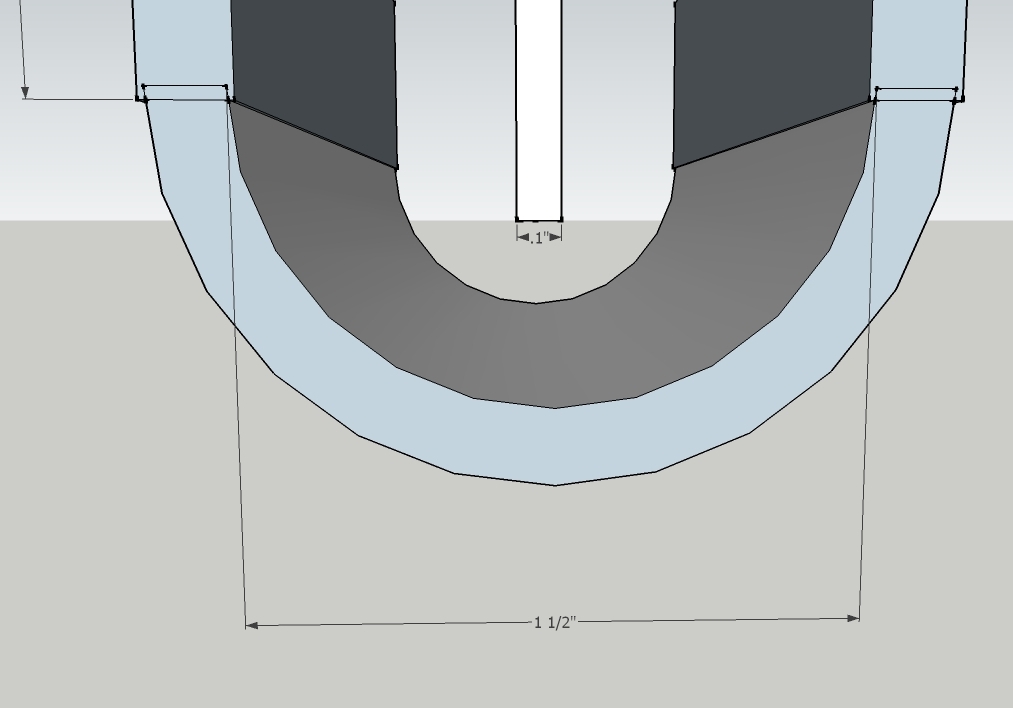
7. Cut two 14″ sections of your 1-1/2 PVC in half length wise. I traced where I was going to cut first. You should probably do the same. This was also accomplished with a drummel.
8. Now you have options. You can epoxy the sides of boil box to the PVC (illustrated) or you could attach the .85″ sides to the bottom plates of the sluice. If you have ugly cuts it will probably be easier to attach the sides to the PVC first that way will stand on its own when you try to attach it to the acrylic plates. If the cuts are nice and square you should probably attach the sides to the base plates first.
9. Assemble the bottom section of the sluice. Use Epoxy to hold it together. The epoxy just holds things together until you get the sides bolted on. You will want to use expoxy that is at least water resistant. If you do not plan to chemically weld the acrylic you will want to prep the edges with sandpaper so the epoxy can form a better mechanical bond.
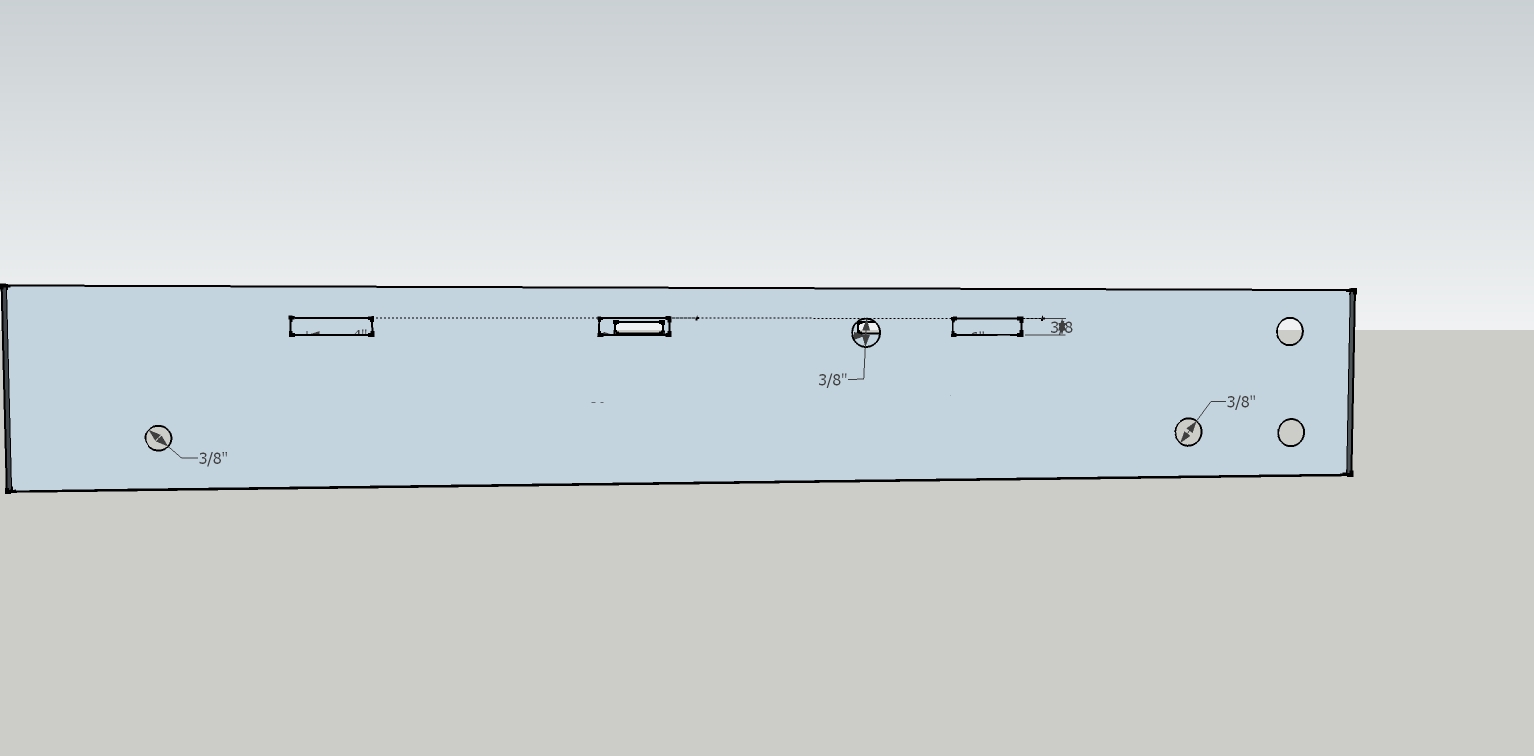
10. Lay one of the sides on the sluice bottom boil box section of the sluice and mark out all of your cuts for the holes and threaded rod. Since it is clear you should be able to mark things out really well. Use the following illustrations to mark everything out. Since it is hand built, I’m not going to try to give dimensions every one made will be a little different. Make the holes the same size as your threaded rod.
11. Clamp the two side pieces together and make your cuts through both at the same time. (Try to give your self some reference points on both so it lines up on both sides of the sluice.
12. Clamp and epoxy/chemical weld the sides onto the sluice. (I did one side at a time) Wait 24 hours to be sure everything sets up nice. If you pre-cut all of your threaded rods you could probably use a few as guides to hold it together while it dries. When I built mine I didn’t exactly have everything planned out so I cut the holes after I had the sides mounted.
13. Build the end of the sluice. I’m not 100% confident in this design so you are sort of on your own. You will will probably want to put in some triangle supports on the bottom and a cross member on the top to add strength.
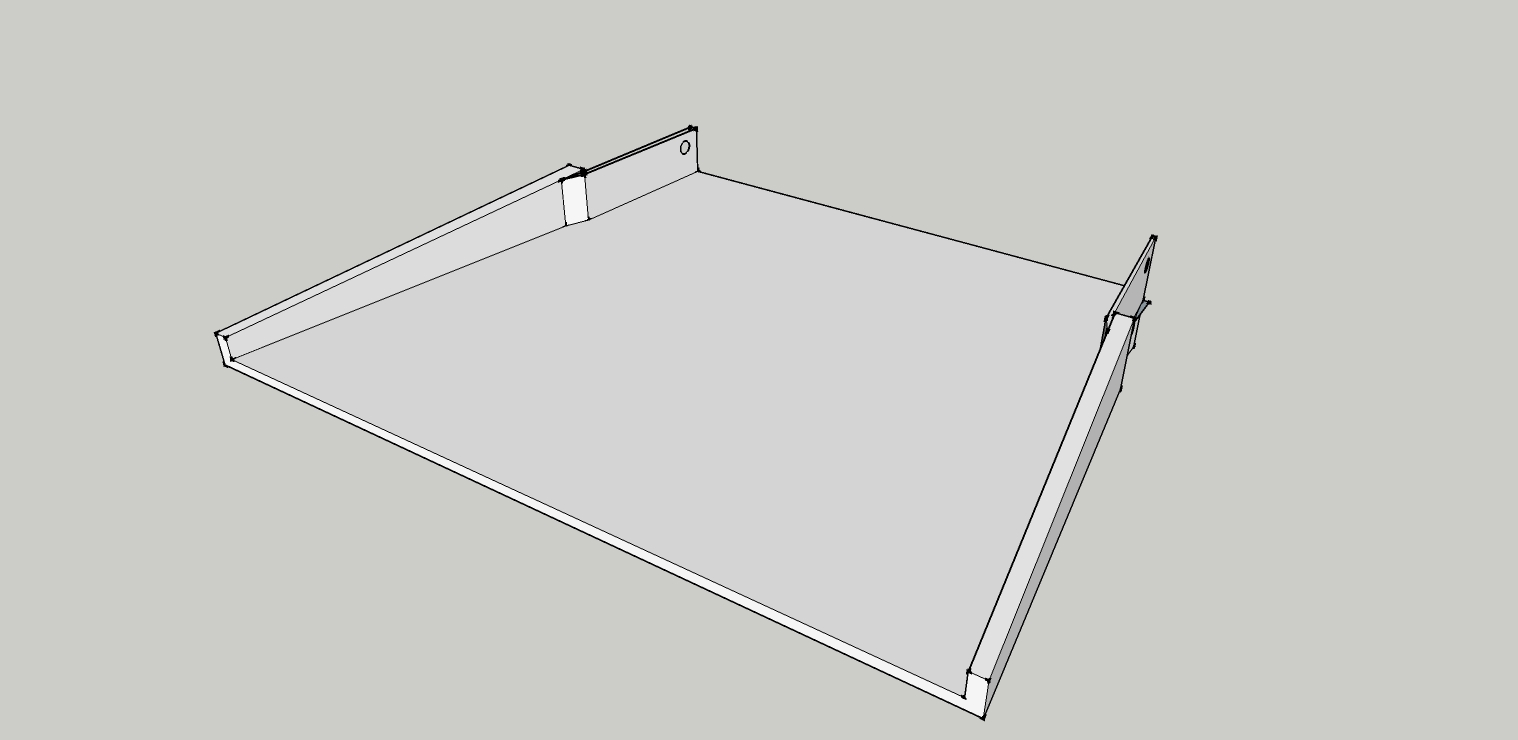
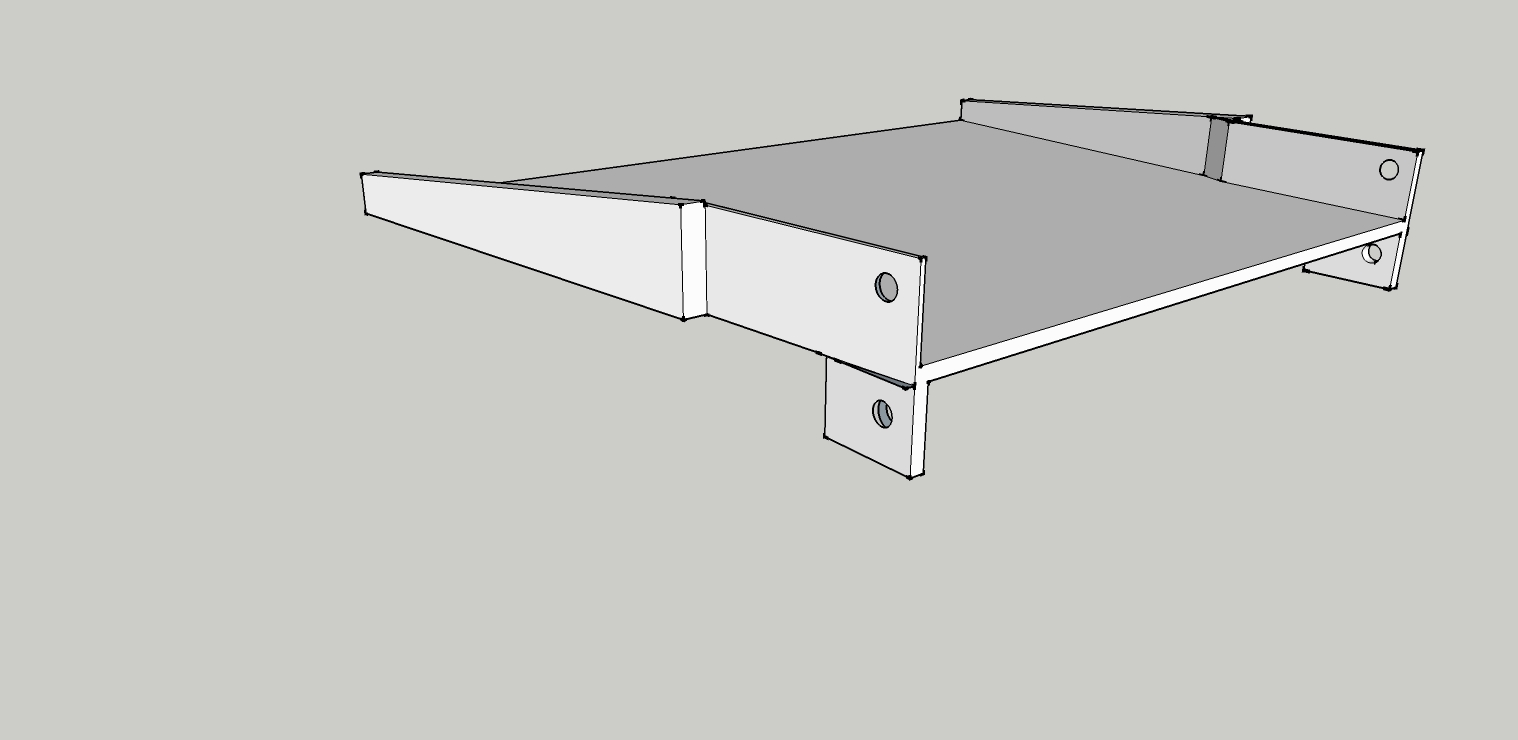
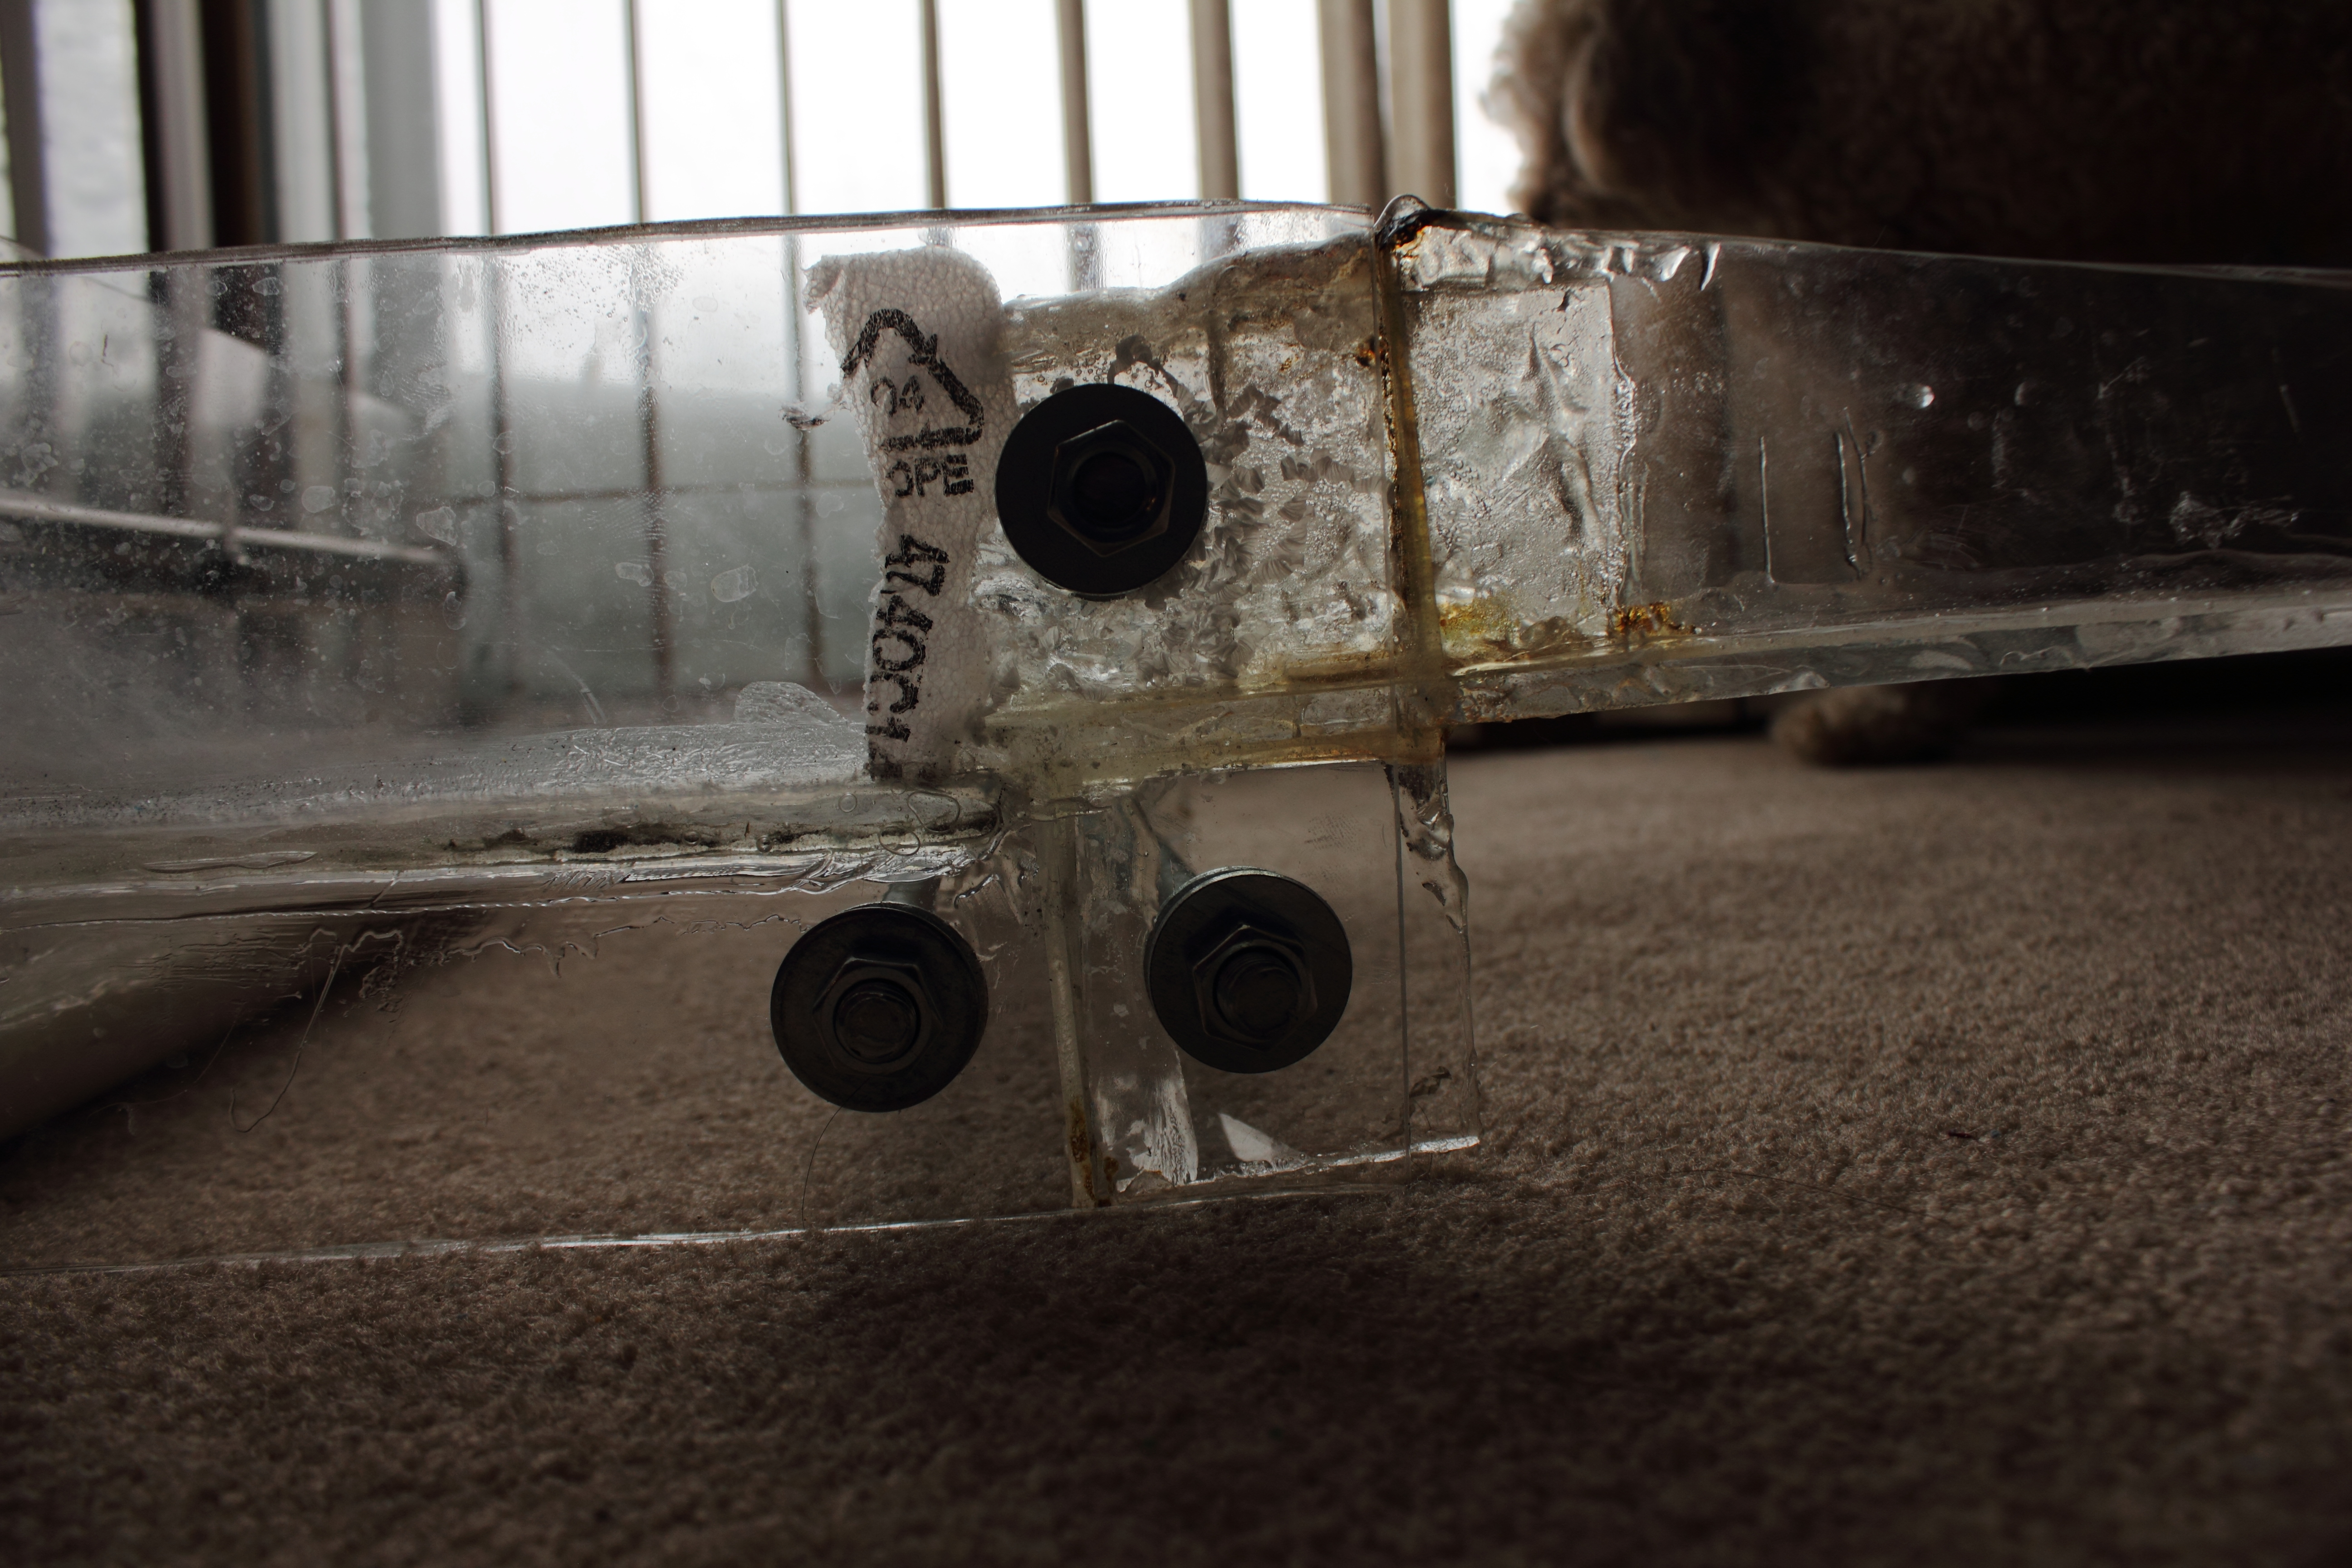
14. Run all your threaded rods through. By this point you probably already have some of them in. I also elongated the holes on the front of the sluice so that there is some play in the angle of the front skid plate. Use washers and nuts on the inside and outside for every rod if possible.
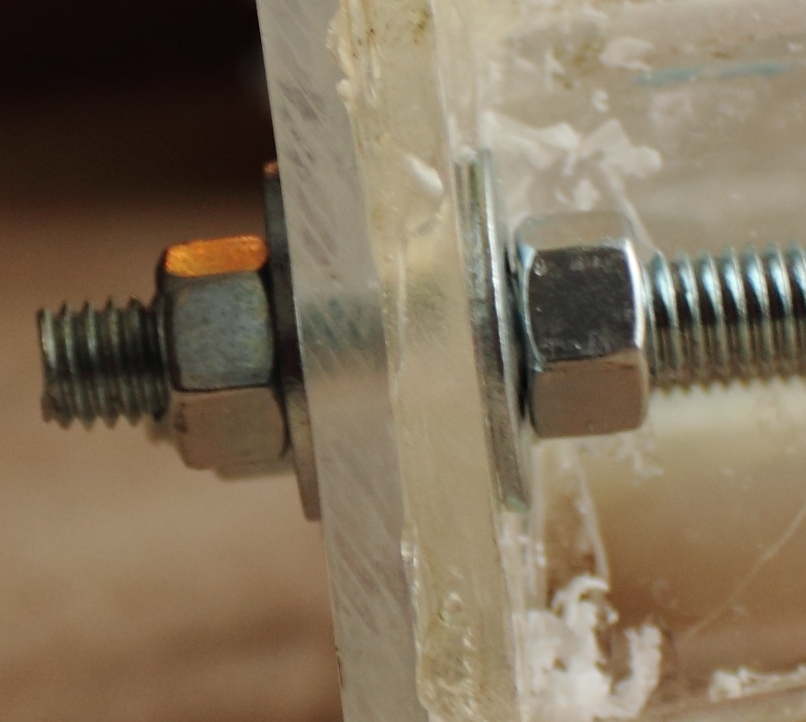
I did not use washers on the inside of the boil box threaded rods.
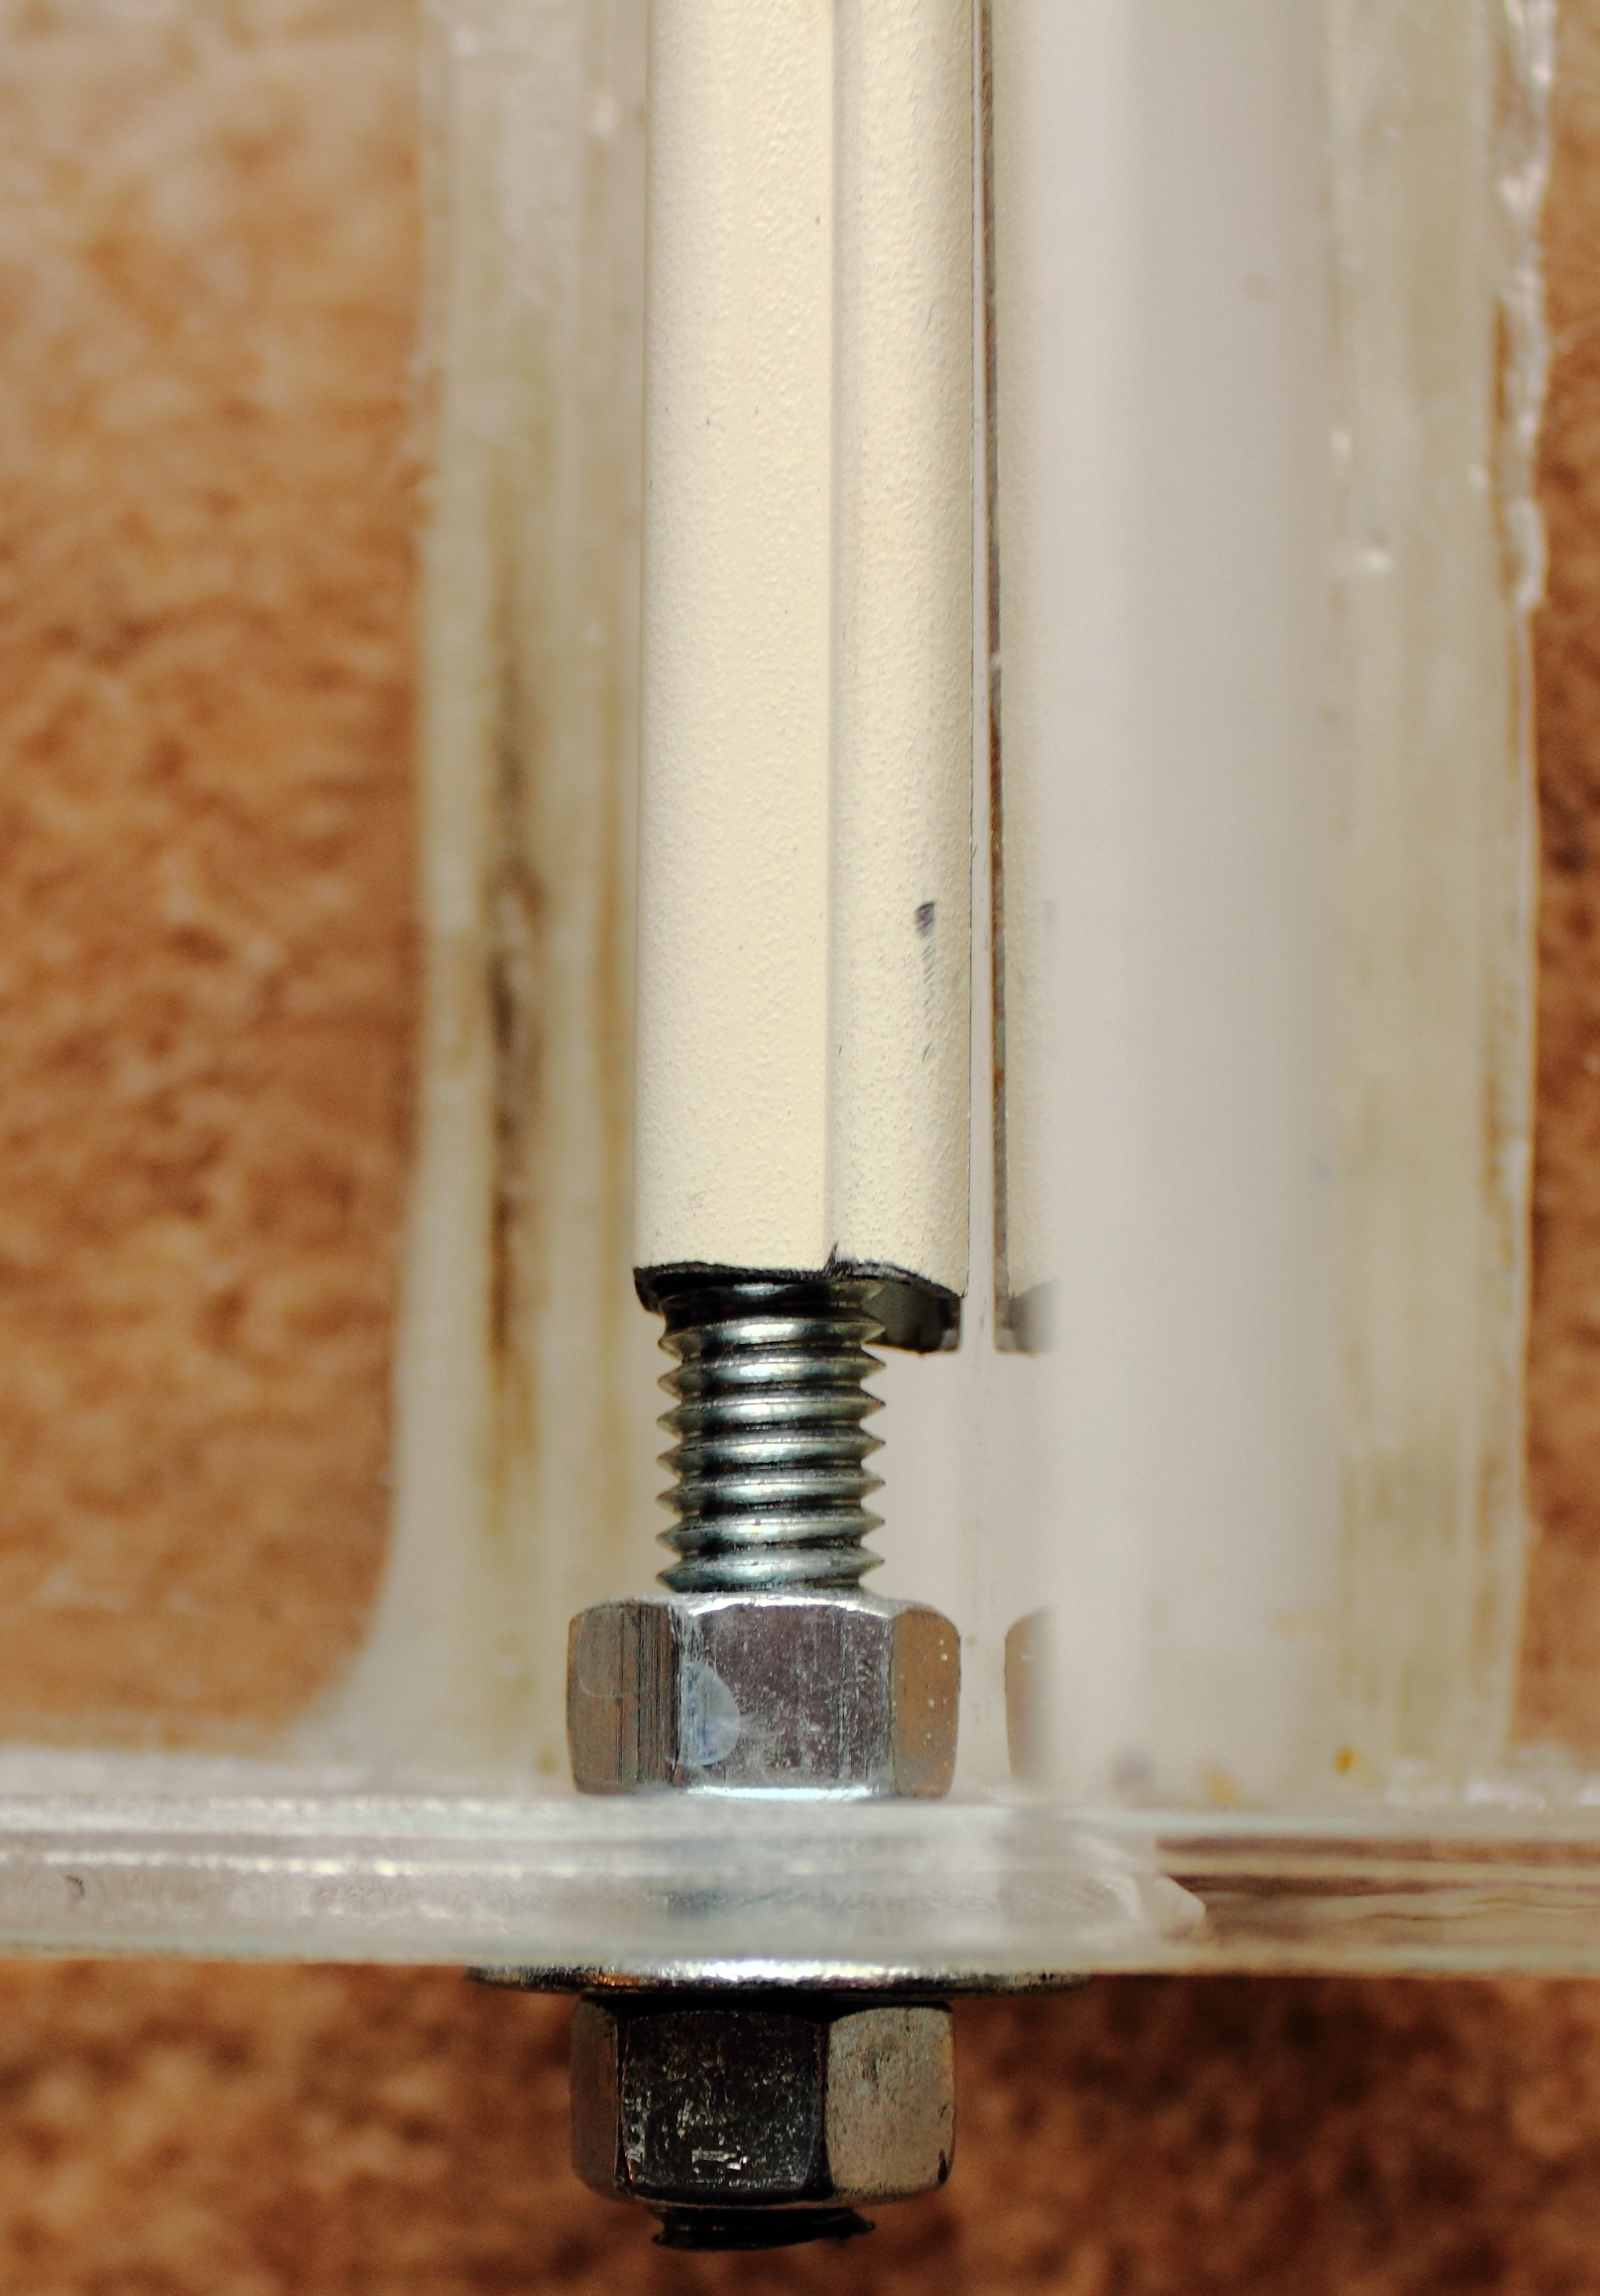
15. Once you have all the the threaded rods in place and you are happy with how it looks cut the Wire Channel (raceway) into sections that will fit over the boil box bolt. Rough up the inside of the channel with a drummel or similar tool. Center on the boil box section bolts and epoxy it down. Allow the epoxy to set. (You are not getting the threaded rods backout without cutting them after this step.)
16. Center and drill a hole through the threaded rod and raceway.
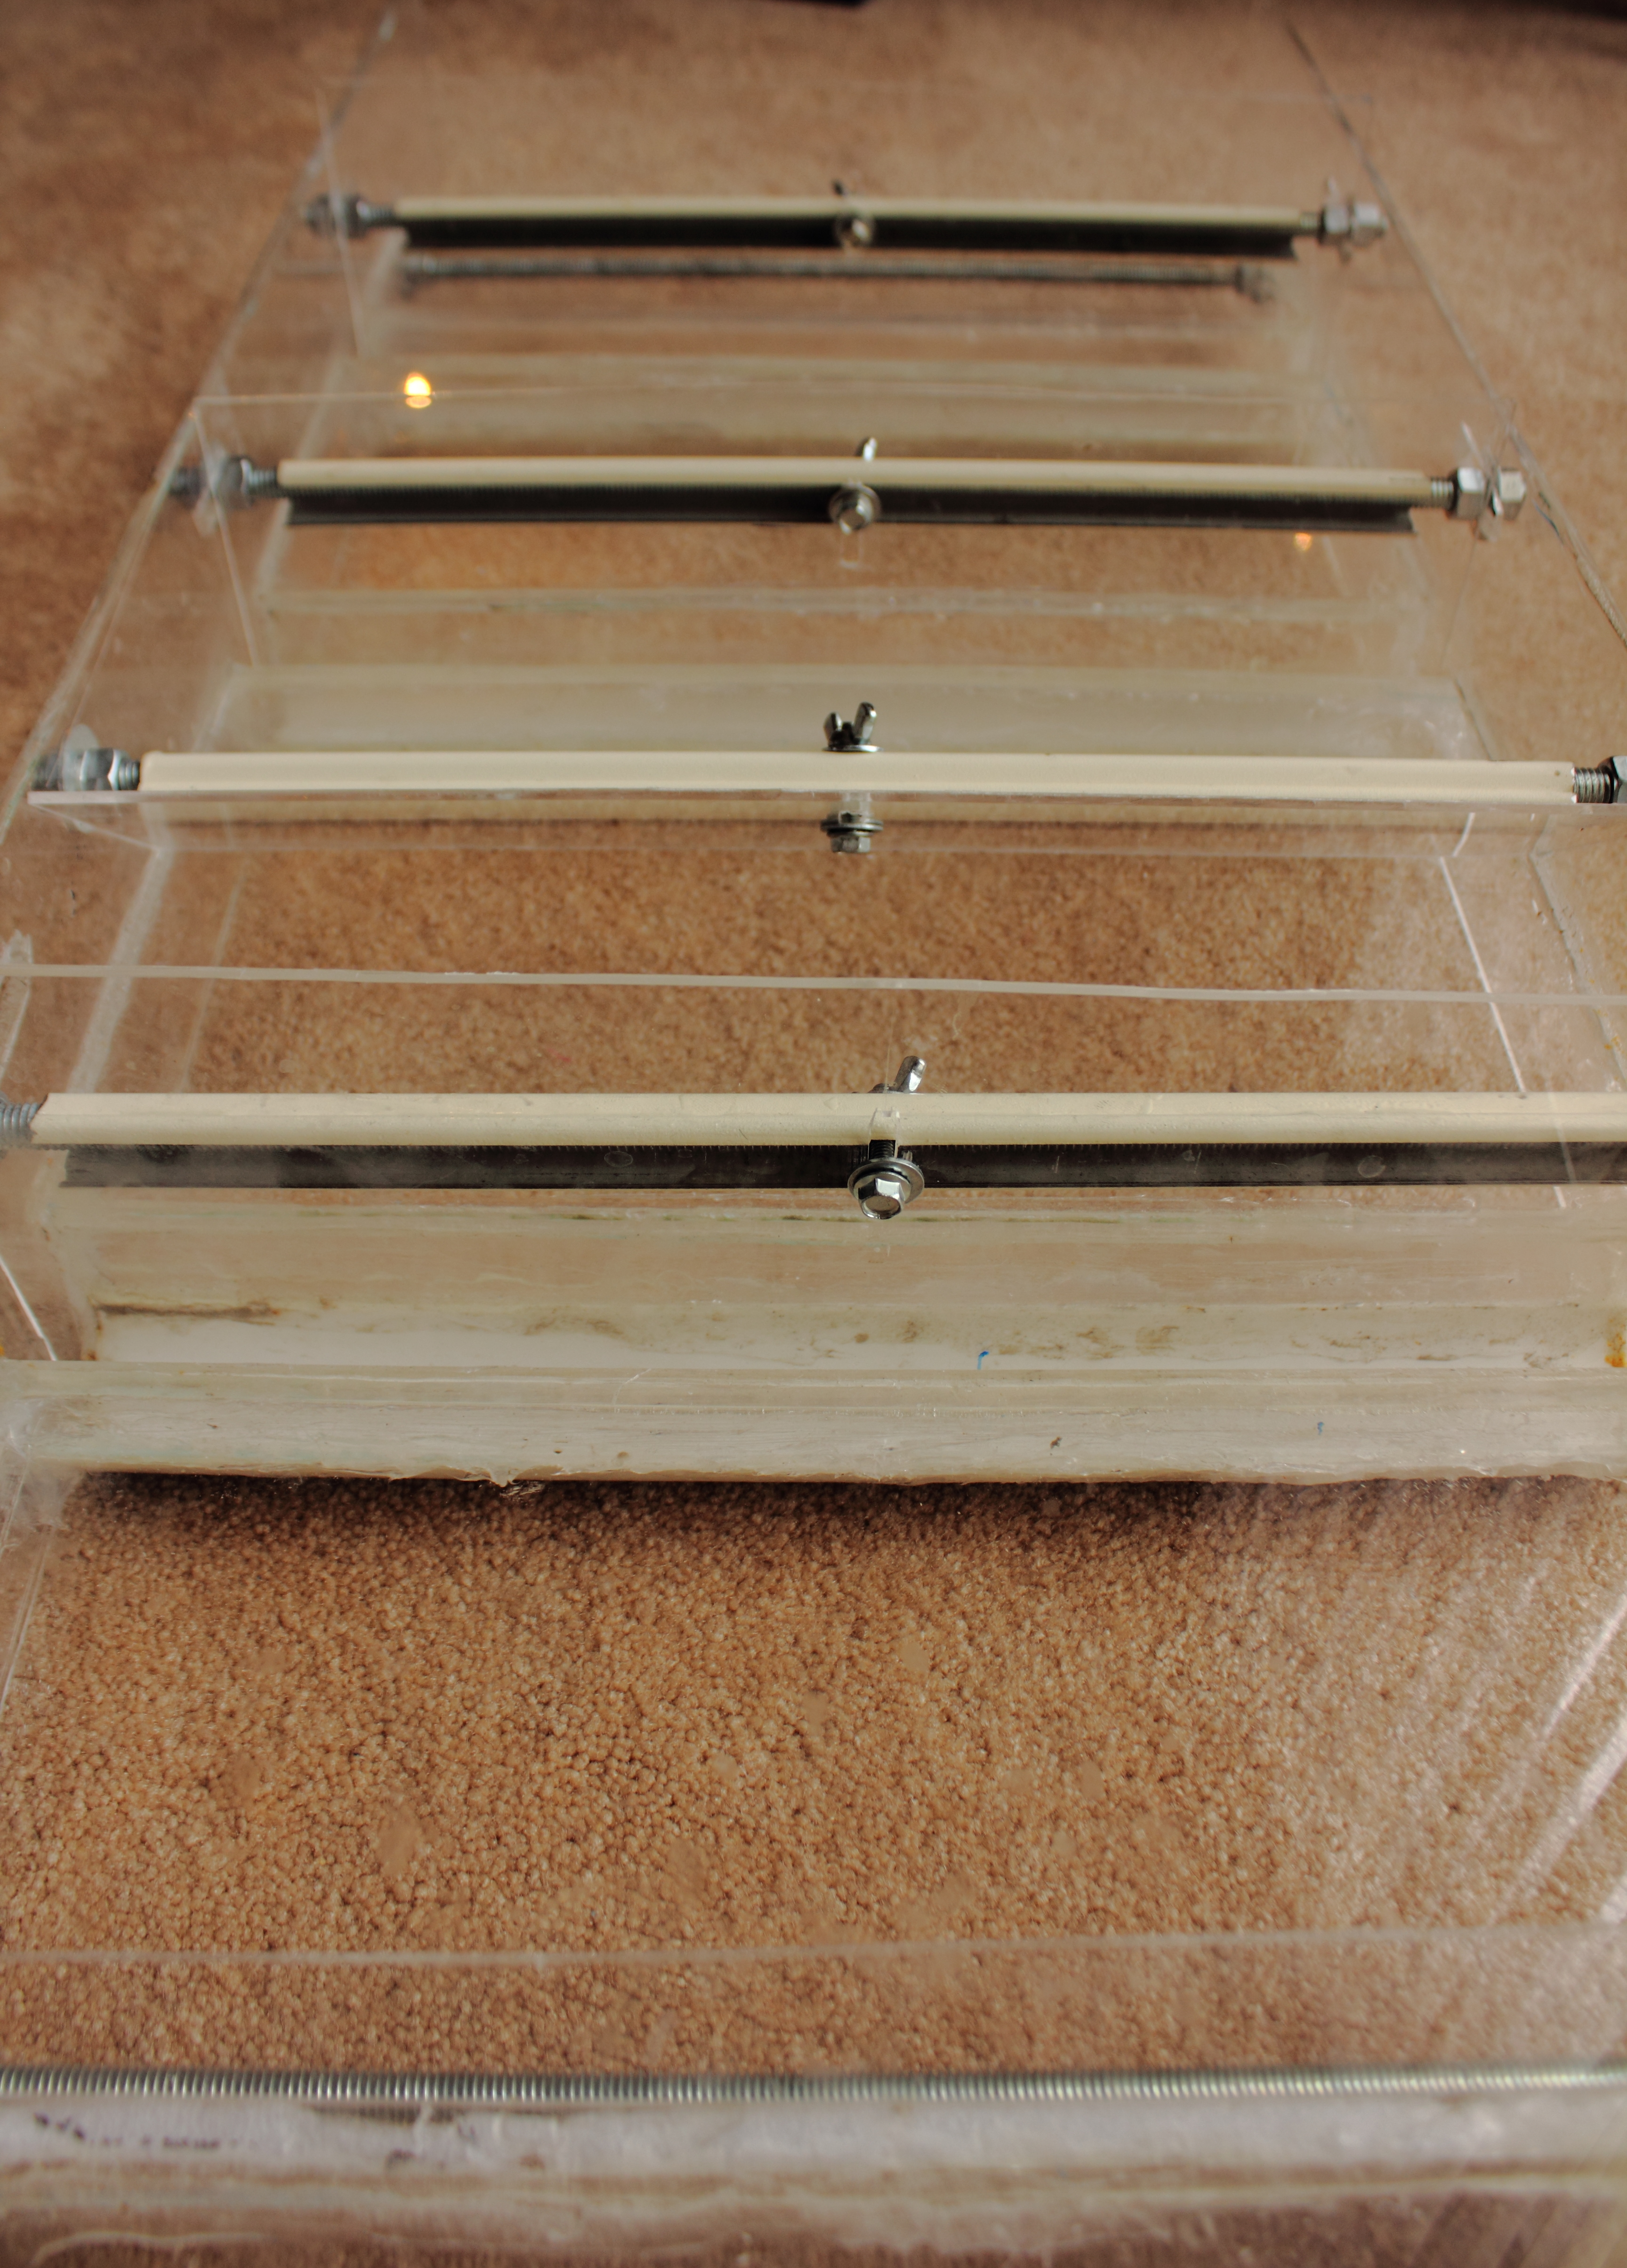
17. Cut your boil box dividers that cause the water to flow under the rail. If you holes aren’t exactly centered in the threaded rod you will wan to mark the holes with a drill while it is inserted through the rods. (*each one might be quite a bit different if you eyeballed)
18. You are probably ready for a test if you have a pump. Run some water and get ready to start plugging holes. 🙂 Use the Loctite Clear Silicone Sealant. It will take about two hours to setup.
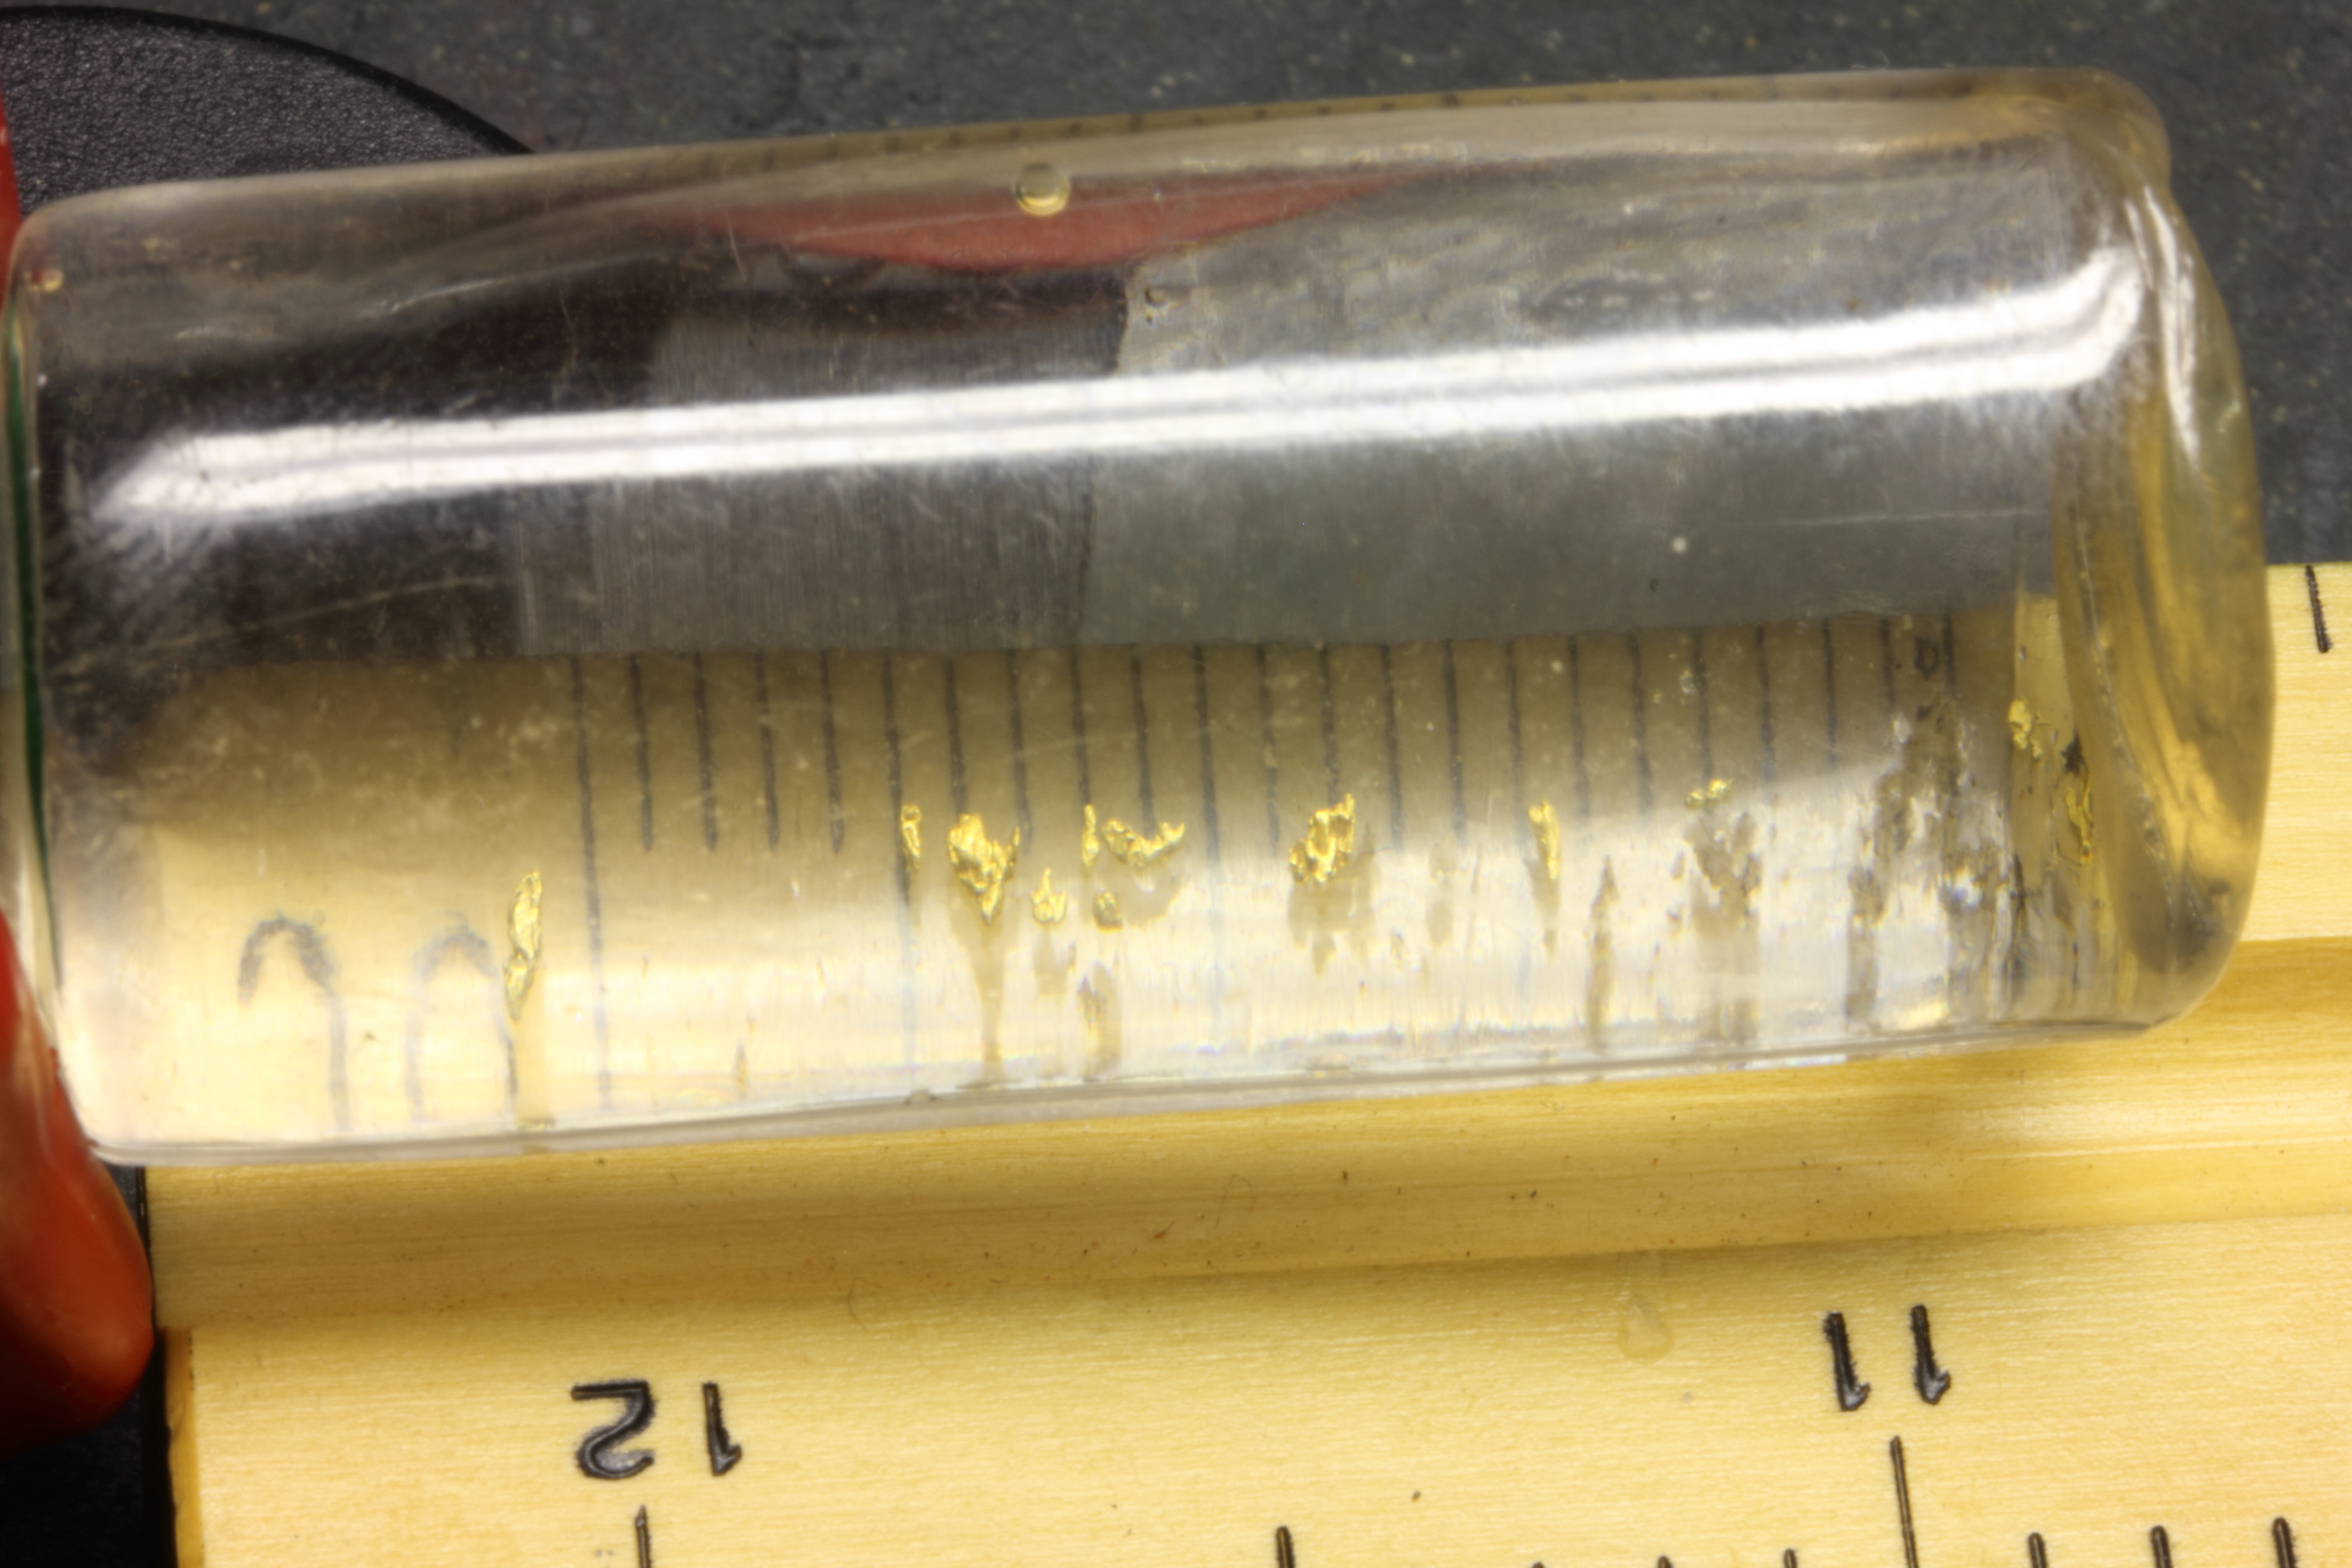
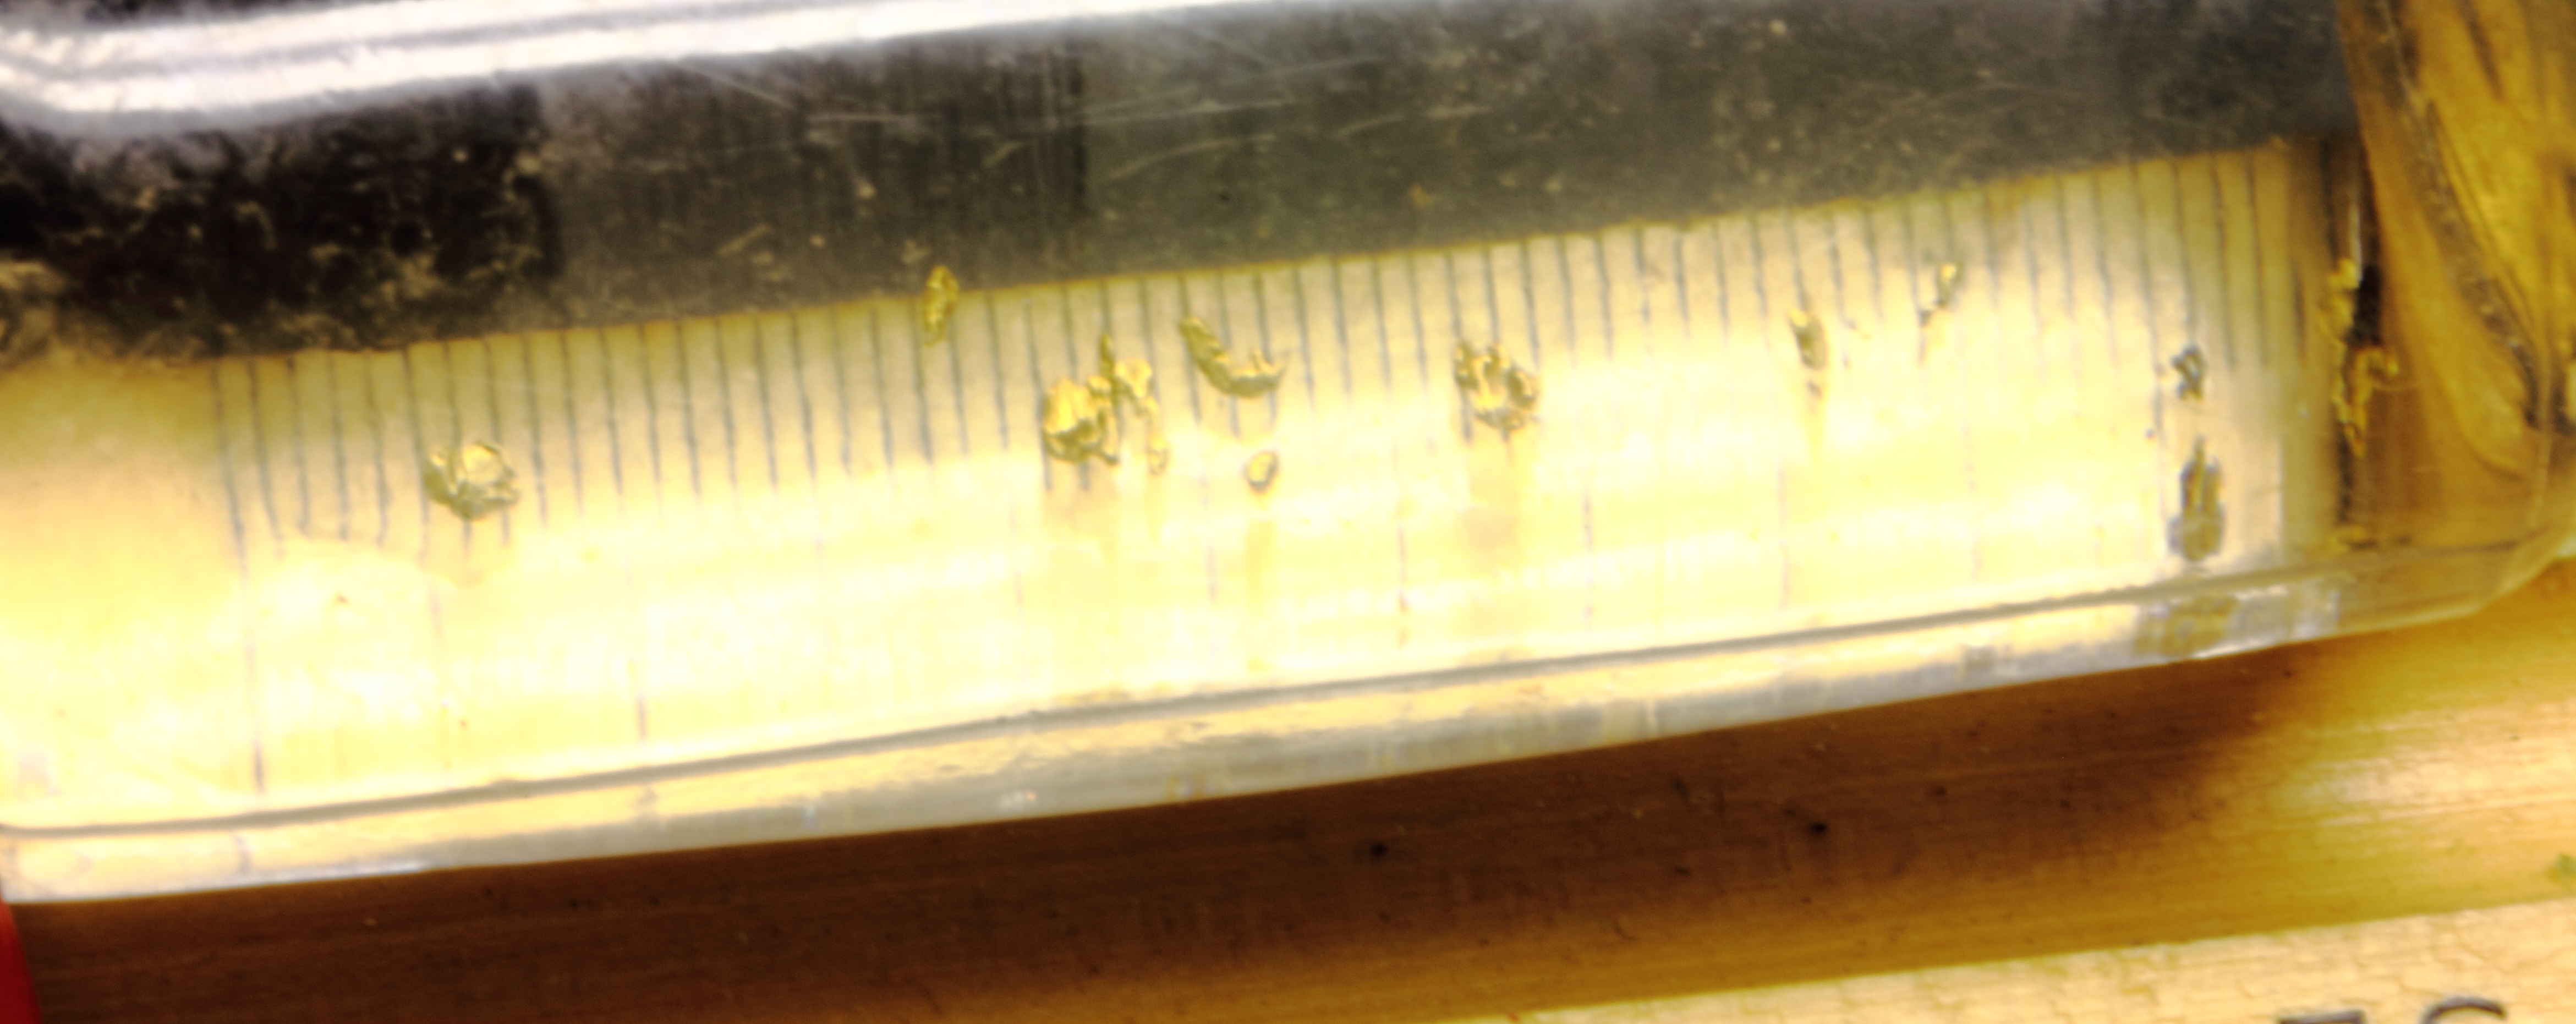
You have all you holes plugged 🙂 Now it is time for a real test run.
I panned 2 oz of black sand concentrates. It had a small show of color. I mixed it all back up and ran it through the boiler box sluice, and back into the pan.
Unfortunately, I did not do a grain count before I re-ran the test. I know there was some loss, but for the amount of effort required and the potential amount of material you could process it would probably be worth it.
After a few seconds of run time (it’s that fast) I was able to pan the black sand back down that I ran through the boiler box. I found one flake of gold that was under 60 mesh in the pan. I think some may have floated away because I wasn’t using jet-dry, but over all it was a fun little test. I’m looking forward to hit some beaches and sandy streams.
I finally found a use for my old Engineering rulers.
20 Mesh Scale
40 Mesh Scale
60 Mesh Scale

WOW! this is great! I tried to build one of these on my own after I saw the one at http://www.grumpyprospector.com, had a hard time with it. Now that I have these plans I
will try again.
After having some time to test it I haven’t been overly happy with it for in stream use. Ideal flow rates are difficult to achieve, but recovery rates are great when you can set it up with a pump system. I like to use it in my basement to run test samples through. It is a lot quicker than trying to pan it all out. It is very helpful to classify material for this design to work.
I may try to do a new version this winter. I have since seen the grump prospector boxes. I have no idea how he tried to patent his design as it is very similar to how a boil box works. Maybe some elements within his boxes are patentable, but the basic idea of how it works is very old. I’m somewhat skeptical of grump prospector’s claims, but I think some of boxes are cool.
If I were you I would scale down what I did. My deign takes a fairly high flow rate to work (depends on classification size), and I run votexmat on the back two sections(which is was catches most of the fine gold). I do not live where I can find nuggets so I have yet to see the boils catch anything other than lead bullets.