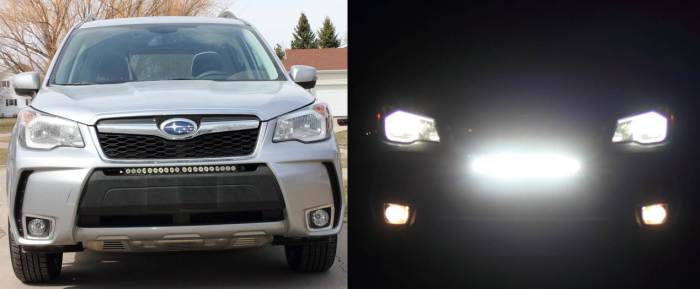
2014+ Forester with grille mounted LED Light bar – Off-road Lights
This tutorial will walk you through one method of installing an LED offroad light bar behind the bumper on your 2014+ Subaru Forester. If you buy the right light bar this is a DIY job that probably should not take more than an hour or two. It took me a little longer, but I did not have any sweet directions. Lucky for you that should not be a problem any more.
If you’re stilling looking for an LED light bar that will fit your forester click Here.
Tools required:
- Flat head screw driver
- Very short phillips screw driver. (Having a long one handy might be a good idea too)
- 10mm & 12 MM socket (wrenches are fine)
- Wire stripper
- Drill & (1/4″ bit) – having a set would be a good idea. ie bits and nut driver
Tools that are handy to have:
Consumables to have on hand:
- Black Zip Ties
- electrical tape
- solder (or crimp connectors)
- washers
- Self tapping screws
Disclaimer – I provide no warranty on contents of this or any article on this site. Use the information provided at your own risk. Please do your homework and take responsibility for your actions. Although there should not be a problem working on your new car may void the warranty so be mindful of that.
General Directions:
- Test your light bar. (A car battery or a battery charger on the 10 Amp setting.)
- Remove your front lower grill and air ducting for the intercooler. – (This link will show you how if you need help)
- Make sure your light bar will fit. Take measurements and plan any bracket modifications that may be necessary.
- Depending on the bracket style you may want to add a small flat piece of metal for reinforcement. (make sure you take its height into account)
- Premark and drill pilot holes. (Not required if you are good with self-tapping screws)
- Mount light. – If possible you want to leave an air gap between the light and plastic parts of your bumper.
- String and secure wire in a safe location and make connections required.
Directions With Photos:
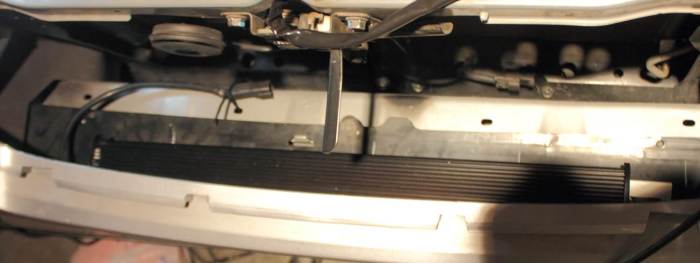
We will be installing the LED bar by removing the grille. If you light bar is longer than 22″ you may want to completely remove the bumper skirt.
So you should be here…
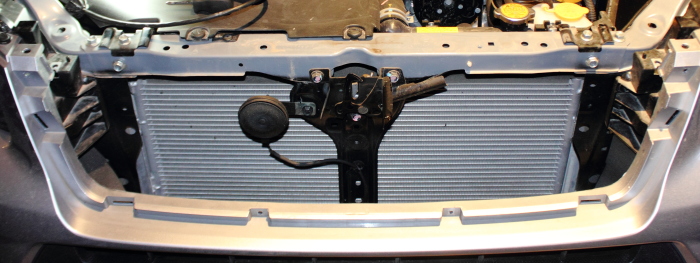
2014 Forester Lower Grille Removed
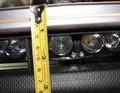
Time to check things out… Put in your light bar and metal spacer/backer. I recommend something for backing if you have the same kind of mount that I did. I ended up buying a 4′ aluminum ruler from walmart and cutting it to about 2 ft as something for backing [$7] (It was the only place open at the time don’t judge me).
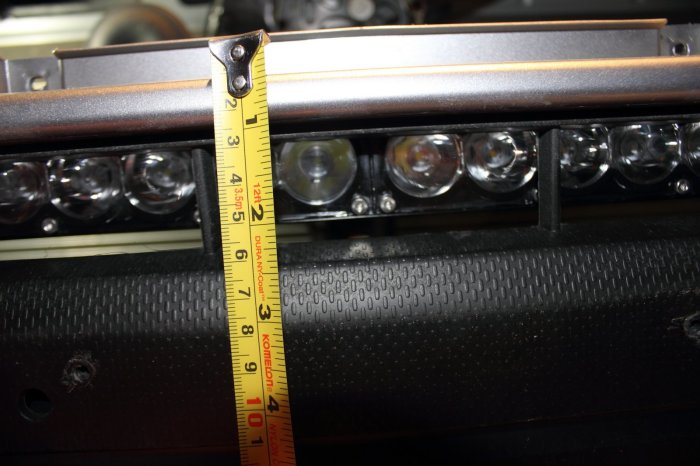
22 inch Cree LED Bar Gap Forester XT
I used 5 self tapping sheet metal screws that were zink plated. The three center screws just help hold the backing down. The outer two screws really hold the LED bar down.
Metal backer with three sheet meal screws and washers
– I didn’t actually plan to use the additional metal backer so I did not make initial cuts on my bracket to compensate.
The thing to notice in the following photo is that I slightly shaved down the side of this bracket so that I could aim the light lower if I needed. You should only need to do this on the side that has the power plug.
Note: you do need to be careful with crappy drill bits when you cut holes this close together. The drill bits can shatter if you catch the edge of the adjacent hole.
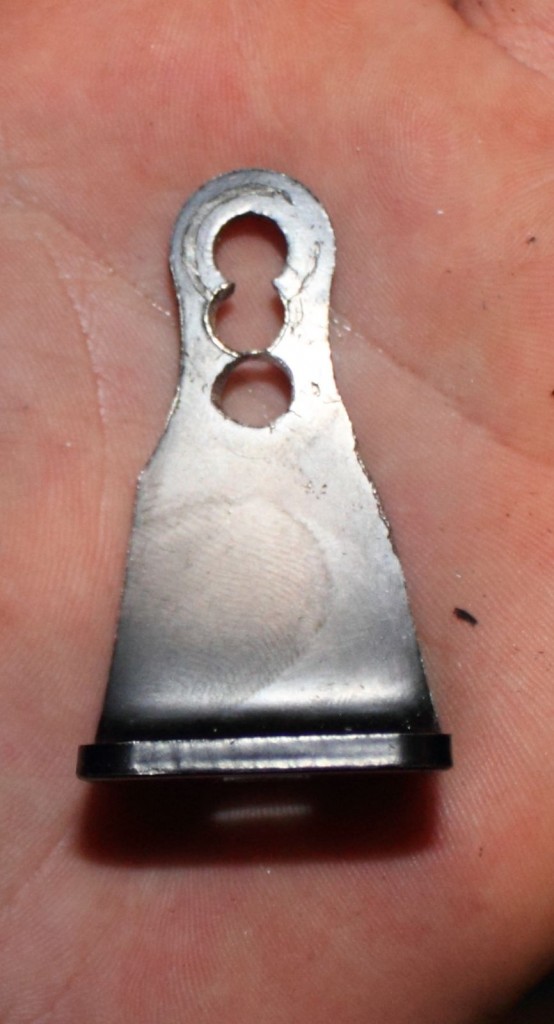
Measure twice cut once – FAIL (plan changed)
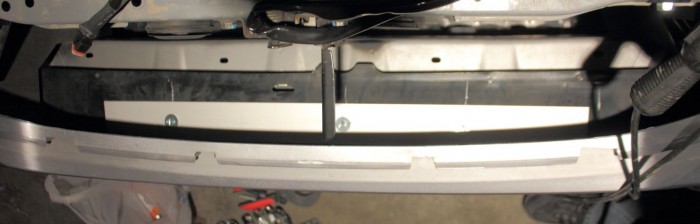
Set your LED bar about where you want it. I made sure to leave a little space between the light and the plastic components of my bumper.
If you are using self tappers they may move when you are trying to tighten them. To avoid the problem, mark where you want the holes and drill partial pilot holes.
Note: You will want the LED bar brackets pointed out to make you life easier (They will probably be pointed in when the light bar arrives).
Cree LED Light bar installed brackets out
OK… The light bar is installed and secured so it is time for some wiring. Unless you know something about wiring switches, do yourself a favor and order a light with a wiring kit. It should include a switch, fuse, and relay. If you are lucky it will be pre-wired and you’ll just have to shorten one cable.
If you order the same kit as me this will be a very easy. I talk about LED bars in this post.
The only problem with my kit was that whoever was putting relay together did not crimp the ground wires in properly so they fell out. I soldered every connection because I don’t like crimp connections much. (They fail when they get old or salt water gets in them)
The following photos are annotated to avoid wordy explanations. If you have any questions please ask I check the site often.
- My starting point was near the battery. (Consider the relay as the starting point)
- The switch was run into the cab of the 2014 forester XT using a factory port through the firewall. “How to route wires through the firewall of a 2014 Forester”
- I cut about 4 feet of slack out of the kit cable and spliced it back together near the LED bar.
The following two photos show where I mounted my relay and connected to ground and power.
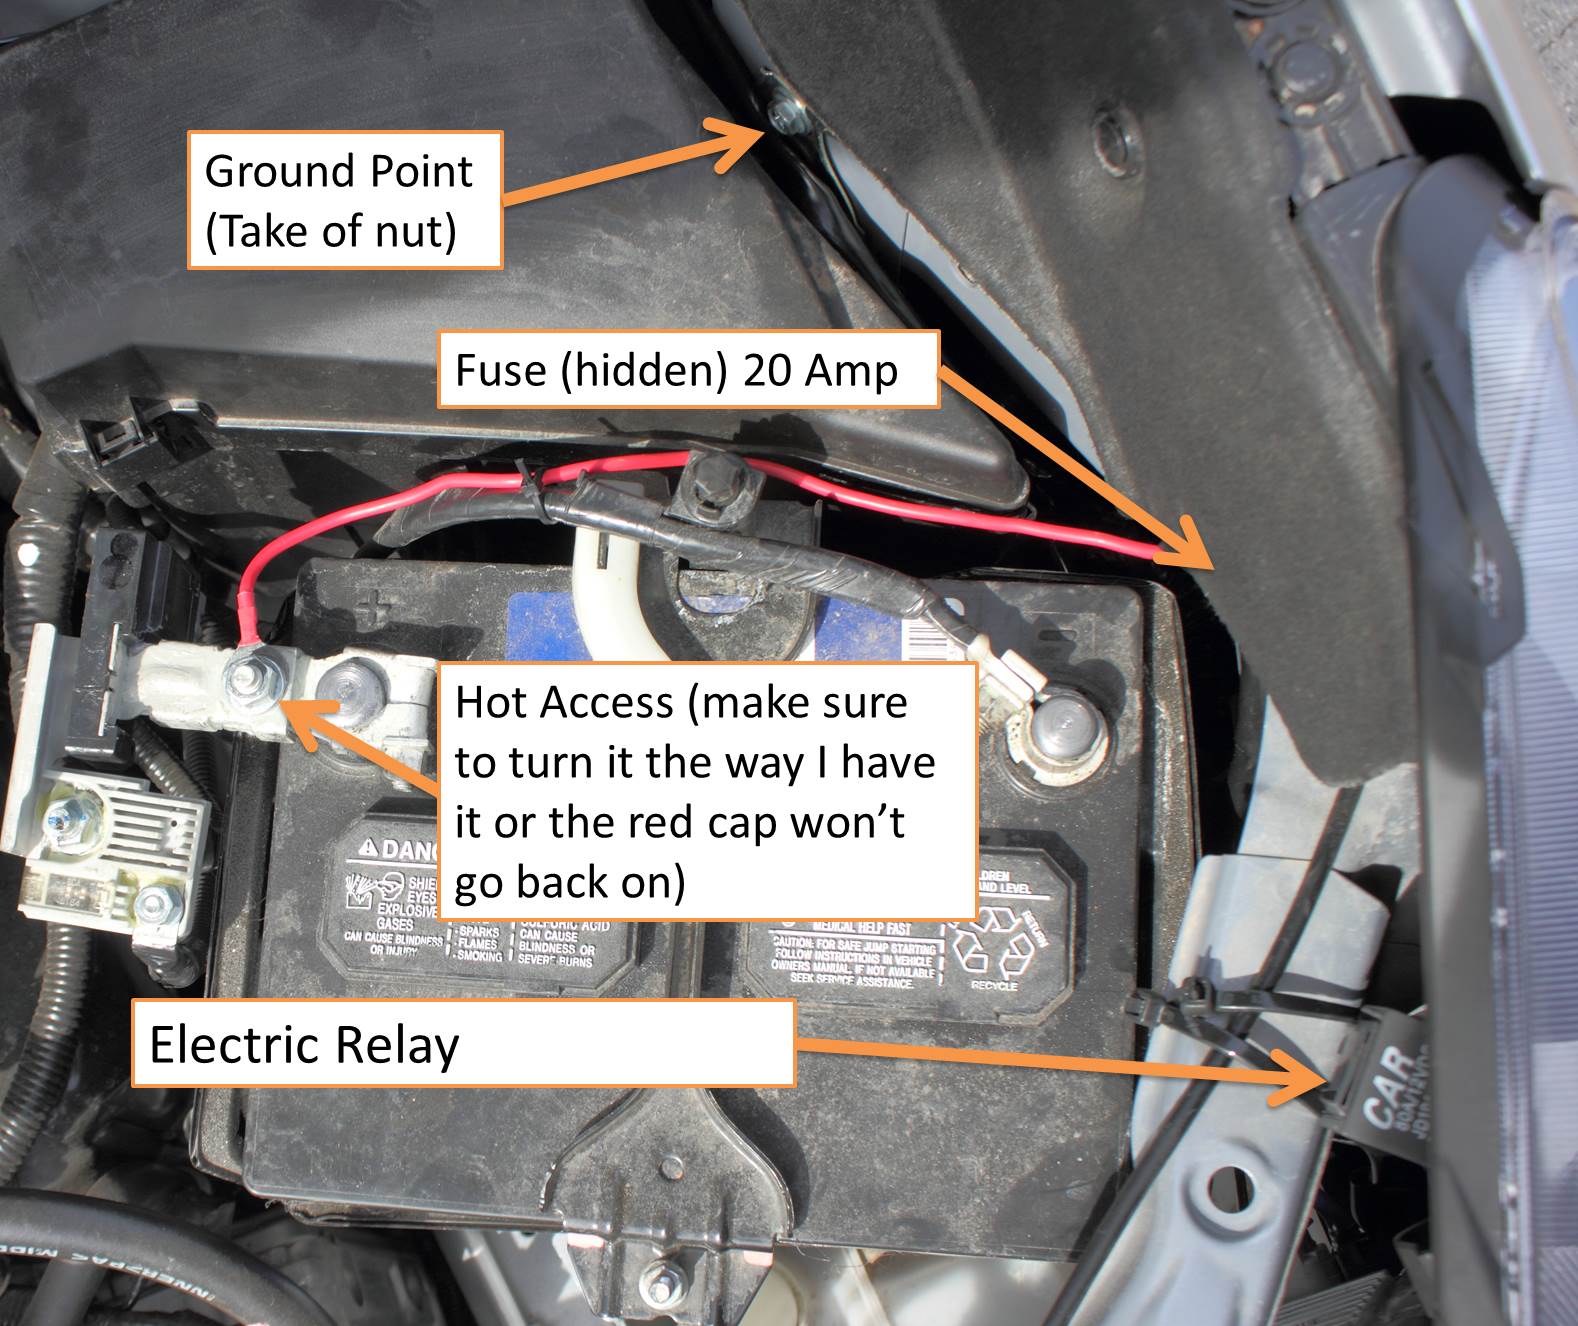
Electrical Relay location for my LED light bar on a 2014 forester. Battery connection is a 12mm the ground is a 10mm
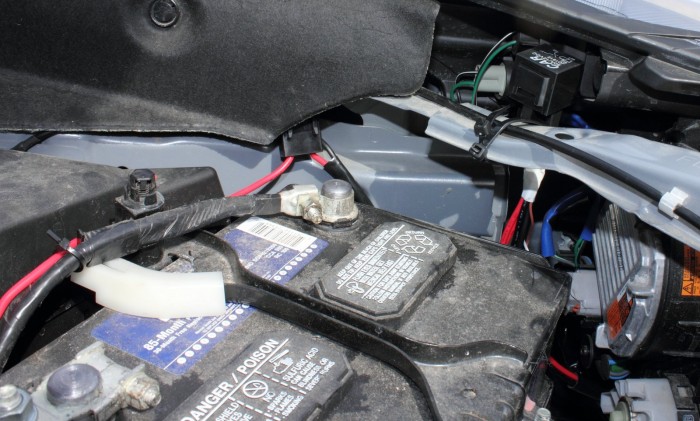
Side view of relay location. (fuse visible)
Routing the switch cable through the firewall of the generation four forester.
Go inside the drivers side and push out on the rubber grommet(top side). Put something in it so you can flip it open far enough on the engine side to pass the switch though the hole.

Factory Firewall Access 2014 Subaru Forester (Just above gas pedal)
Left a light on in the foot well so I could find the hole.
Oh yeah… You should have removed the engine cover too. Click here if you want tips.
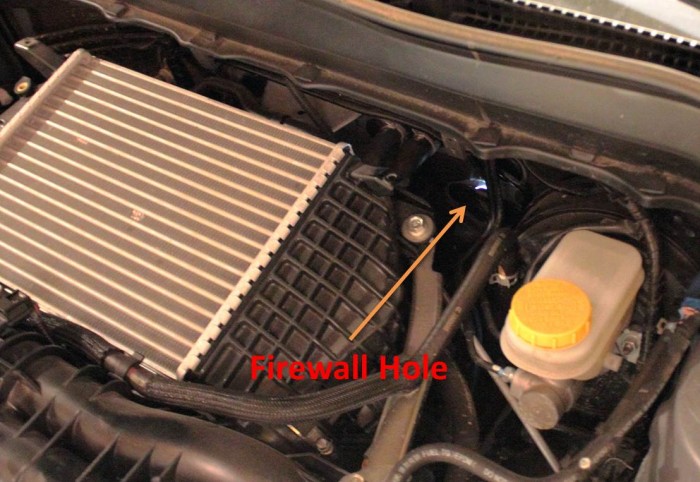
2014 Forester XT Firewall Access Hole on the engine side
Put the switch through the hole above and you a basically home free. (If you have the same kit as me you could remove the plug in the photo below and reconnect it.)
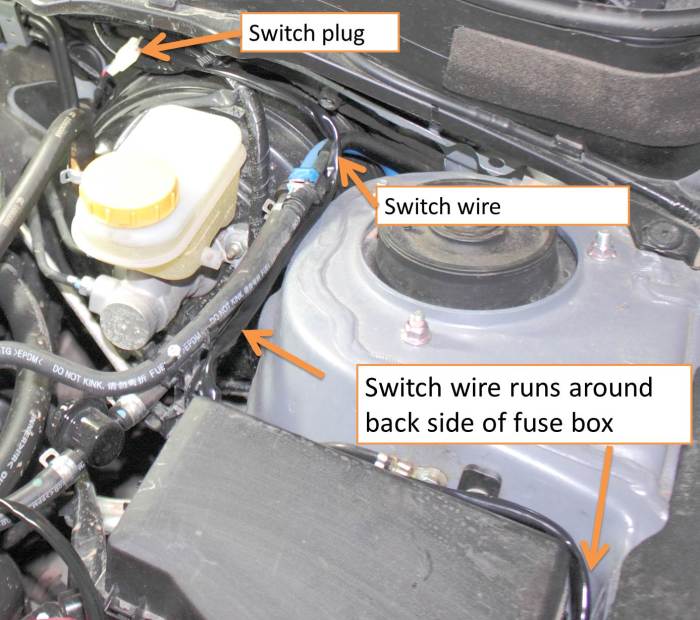
Switch Wire Path through firewall 2014 Forester
Connect the LED bar by passing the plug under the foam on the drivers side.
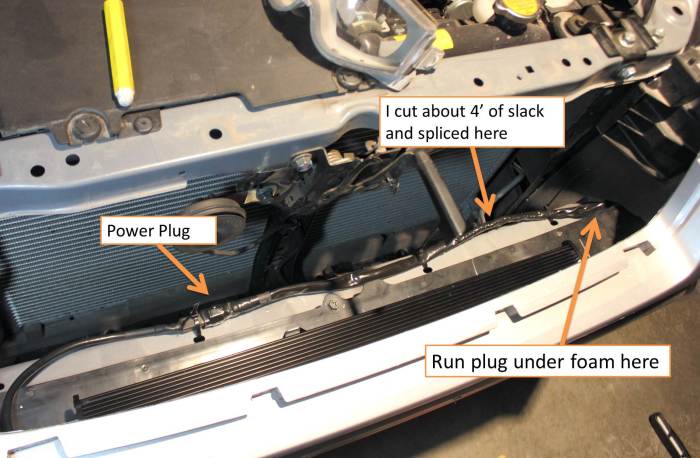
LED Light Bar Connection Details 2014 Forester
Bling Bling….
The only part I didn’t cover is installing the switch and making it look nice in the cab. I may update when I get around to that part. 🙂
If you have any questions please let me know.

Great post! Was wondering if you had and pictures of the switch installed inside of the forester?
Great post! Do you have any pictures from your switch install inside the Forester?
Actually, I’ve been lazy and never put in a permanent switch. I wanted to put in a three way switch.. one where the LED bar is tied to my brights and the other is just on. third position would be off. I was unable to figure out how to tie into the brights. I know one other guy did it though. I’ll probably ask him someday.
Hey! any chance you could help me out? I have a few questions/want to confirm a few things. I have a 15 XT. Text/call me at xxx-xxx-5561
Christian
Ben – Edit: Removed your phone number.